
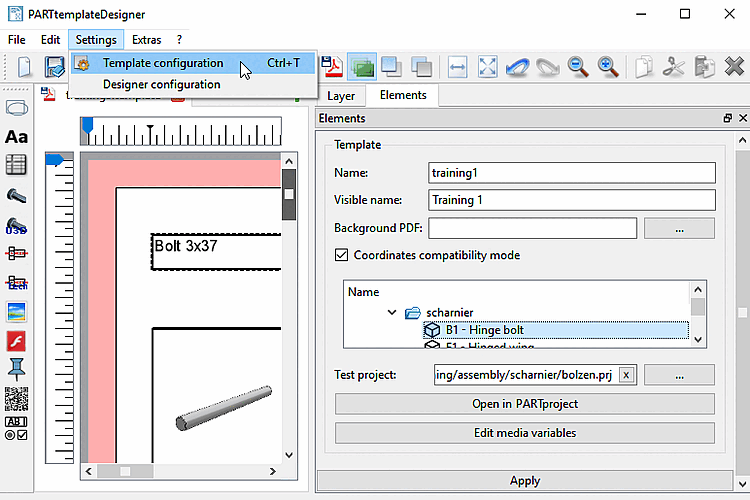
The call up of the "Template configuration" dialog happens via:


Name: If you select the function Save as catalog template
 function, this name is used.[117]
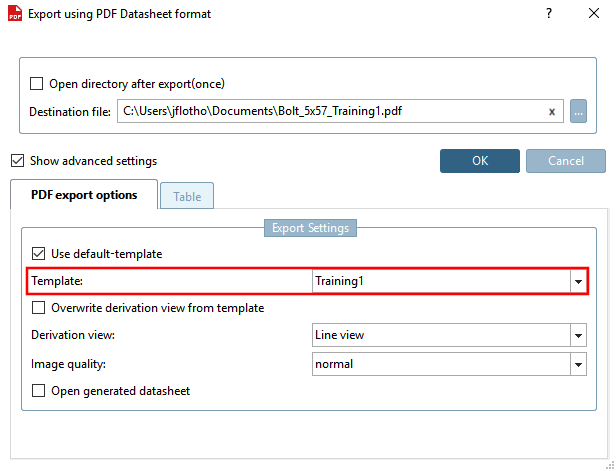
Display name [Visible name]: Name that is displayed as the template name during data sheet export in PARTdataManager as the template name. If the display name [Visible name] has not been specified, the entry under Name is used.
Background PDF: If necessary, you can load a background PDF [Background PDF].
However, as soon as a template is updated to the current format, the background PDF [Background PDF] should be replaced with the corresponding images if possible.
See also"Import".
Coordinates [Coordinates compatibility mode] compatibility mode:
When editing in PARTtemplateDesigner, values are entered in mm. The values are then converted into PDF coordinates in the template.
Up to < V11 SP10 values were read as integer, which led to differences in the range from 0.1 to 0.6 mm (what is not really striking when printing).
As of V11 SP10 the calculation is made with floating-point number (meaning higher accuracy).
To ensure that old data sheets are not affected by the change, there is now a new Coordinates compatibility mode option.
Compatibility mode on: When opening (or exporting) an old template, compatibility mode is switched on so that truncation to integer continues. This means that old data sheets are not affected unless compatibility mode is deliberately switched off.
Compatibility mode off: When creating a new template, the compatibility mode is switched off by default and floating point numbers are used for the calculation.
Changing the test project makes possibly sense, in order to check the depiction at different projects (different number of table lines or technical views).
Open in PARTproject: [Open in PARTproject]
Certain functions are only available in PARTproject and not in the Media Editor [Media editor]:
Inheritance of project settings to the whole catalog. See Section 5.9.17.3, “Copy (inherit) templates and variable data ”.
The translation can be done in PARTproject or in the Media Editor (see Section 5.9.17.2, “Translate Media Variables ”).
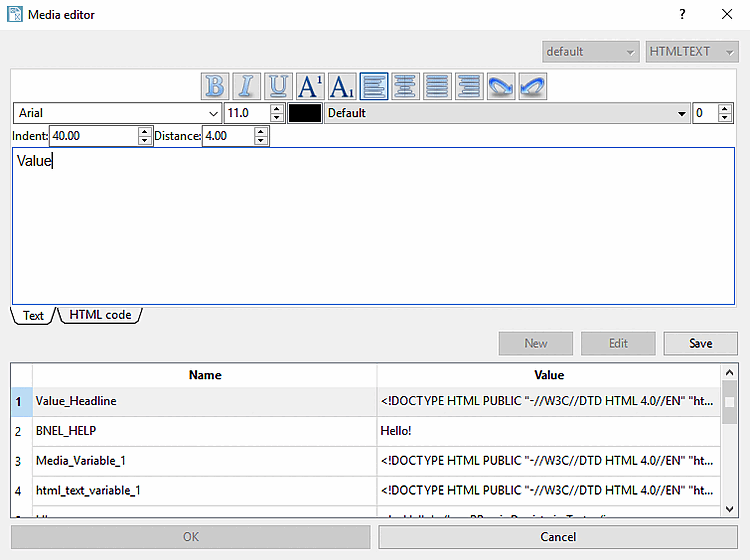
Edit [Edit media variables] (and create) media variables:
Click on the button to open the Media Editor [Media editor] dialog box.
The Media Editor [Media editor] contains the functionality for creating and editing media variables. In PARTproject this option is also available. The advantage of the Media Editor [Media editor]: a clear interface and you can work faster. However, the settings made here relate to the test project and must then be inherited in PARTproject to the catalog level (see Section 5.9.17.3, “Copy (inherit) templates and variable data ”).
Translations of media variables can be entered both in the Media Editor [Media editor] and in PARTproject (see Section 5.9.17.2, “Translate Media Variables ”).
A detailed description of the Media Editor [Media editor] can be found at Section 8.6, “Editing media variables in the Media Editor ”.
[117] The catalog template is saved with the file types .template and .ptdef under "_templates", i.e. training1.template and training1.ptdef as shown in the example above.