5.12.9. Classifying:
Use of templates and plugins 5.12.9.1.
Classification tab page: Manage and execute templates |  |
| Prev | Next |
Create classes and attributes in different templates and then assign them to projects and complete directories specifically. This will accelerate the classification process of whole catalogs significantly.
Templates can contain just one single class system but also multiple.
There are different options for the designing of templates.
Example with setting a GTIN number with specific value
The GTIN-number attribute, for example, exists in many classifications. Now when creating a variable for this number in the template management and inserting it in different classifications, it will be set at all occurrences in other projects at once when executing the template.
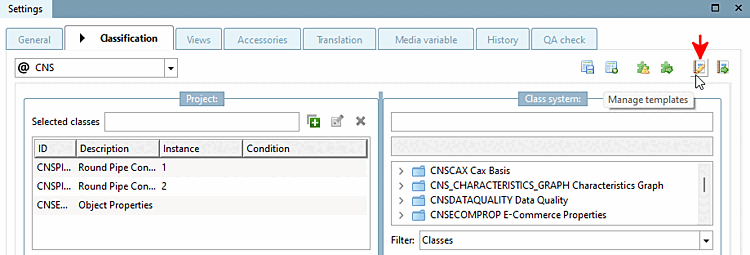
Select the Classification tab page and click on the Manage templates button.
-> The template editor [Template Editor] opens.
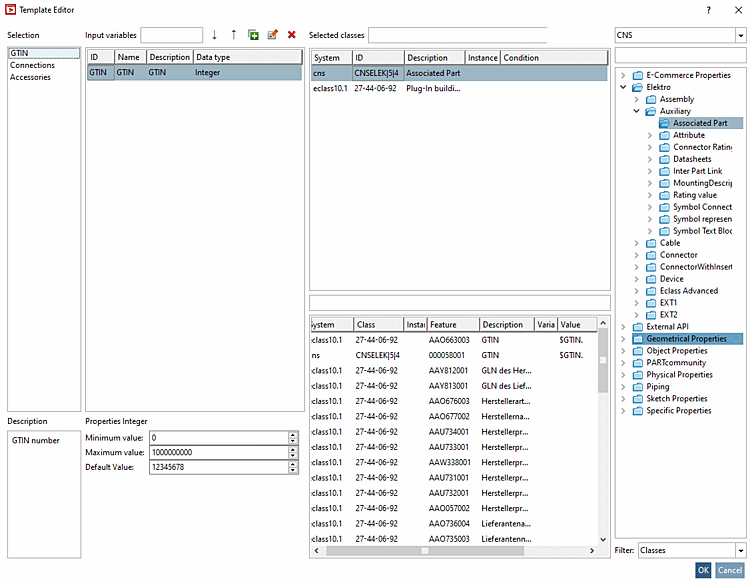
Top left, create a new template via
 button or select an already existing one (here in
this example GTIN).
button or select an already existing one (here in
this example GTIN).Select the class at the top right of the list box (in this example, "ECLASS 10.1." and "CNS" in succession).
Perform a double-click on the desired class.
-> The class appears on the left under Selected classes.
-> In the field below the attributes of the selected class are listed.
You can now optionally enter table variables ( Variable column) or fixed values ( Value column).
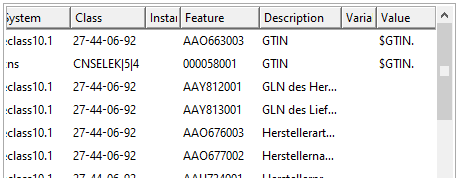
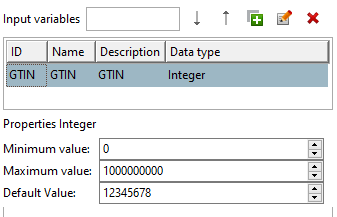
You also have the option of creating variables with specific values under Input variables, which you can then also use for the selection under Variable and value (here in the example "$GTIN."). Create new lines using the
Button. Fill in the ID, Name, Description and Data type fields. Depending on the data type, further corresponding input fields are displayed below.Via list field, switch to another classification (here in this example "CNS") and repeat above procedure for any other classes and attributes.
Click on Manage templates
 you can open the Template Editor again at any time.
Now you can assign the template data either to single projects or to directories:
Select the project to be classified on the basis of the template data.
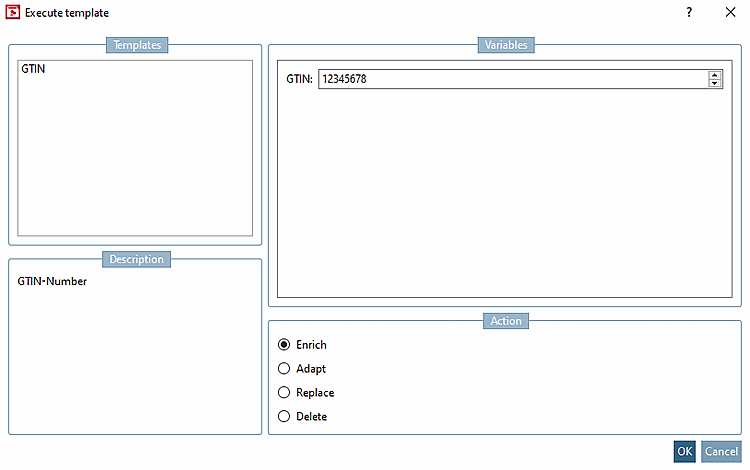
Open the Execute [Execute template] template dialog by clicking on
 to open the Execute template dialog.
If you have created variables [Input variables] under Input variables, these are listed in the dialog and can optionally be adjusted.
→ Existing classification attributes are overwritten with template values. No creation of new classifications/attributes (similar to the previous option Overwrite existing classifications ).
→ If there is no entry, the corresponding value from the template is set; if there is an entry, it is replaced by the new value.
The classification selected/defined in the template is deleted (including values)
→ Classifications are also set in hidden projects. The setting is switched on by default.
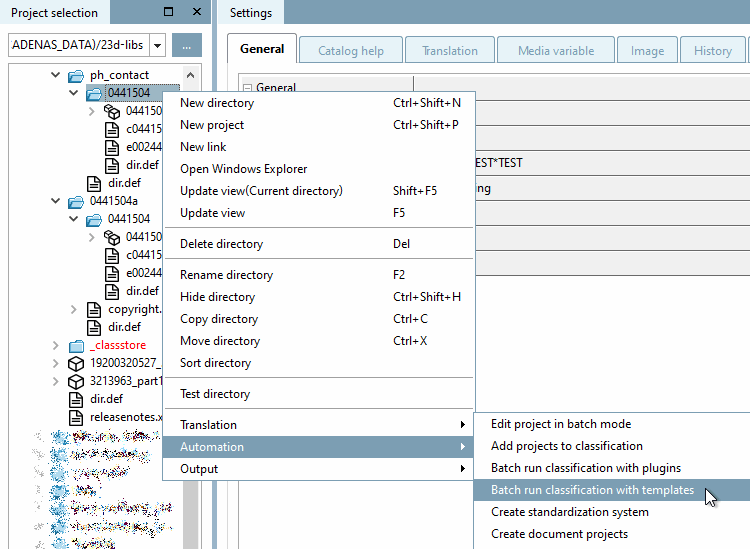
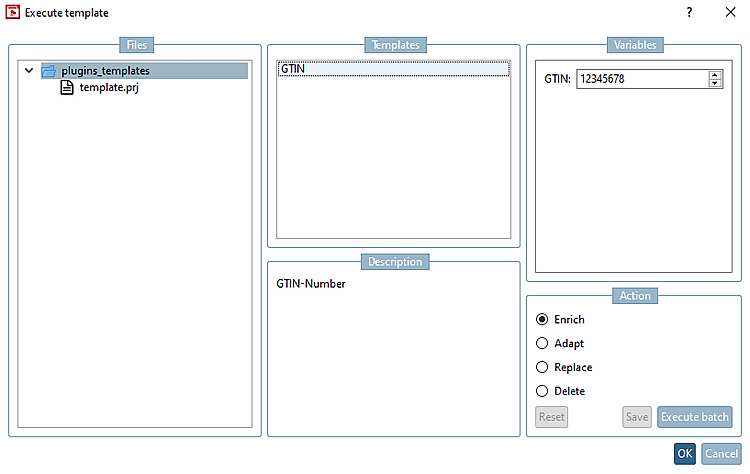
Under Automation, call up the context menu command Batch run classification with templates.
-> The Execute template dialog opens, the details of which have already been explained above.

![[Tip]](https://webapi.partcommunity.com/service/help/latest/pages/jp/ecatalogsolutions/doc/images/tip.png)
Storage location of the templates
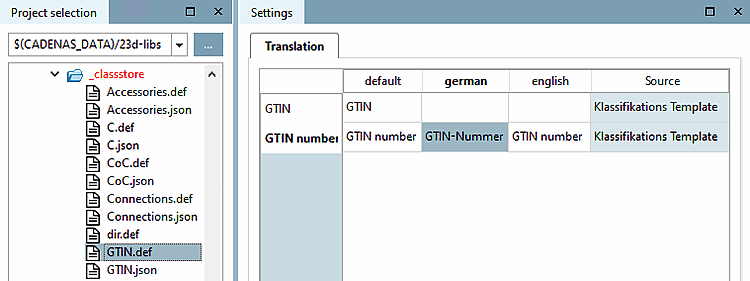
The templates created in the Template Editor dialog are saved in JSON format at the main level of the catalog in the _classstore directory.
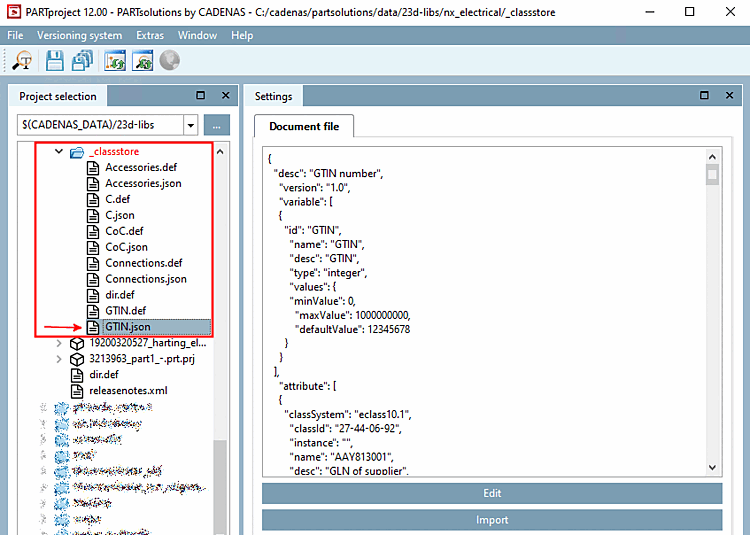
There is a .def file for each template in the _classstore directory. Texts such as the description of the template can be translated here.