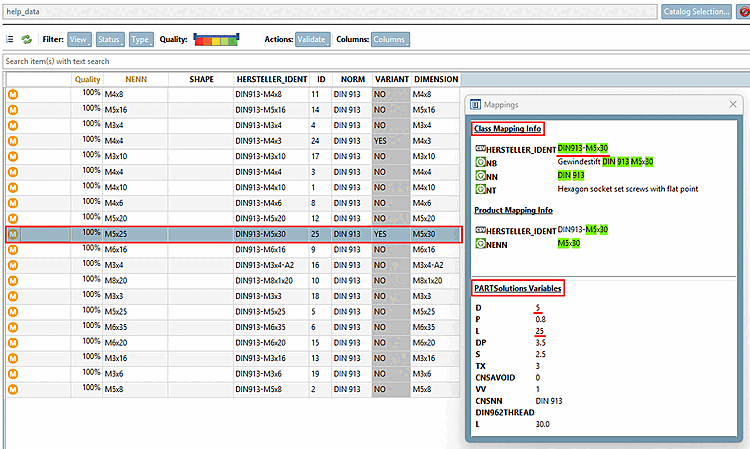
Take a look at the imported CSV catalog[6] ("help_data") now with the mappings created for the DIN catalog (shown here as an example for the DIN catalog).
Go to the PSol Catalogs dialog box and select the " Only show assigned classes [Only show assigned classes]" option.
-> You can now see all the mapped classes for the selected standard and have the option to check in detail whether everything is as desired.
Select a product line and check in the Mapping dialog to see if the information under " Class Mapping Info " and " PARTsolutions Variables " matches as desired.
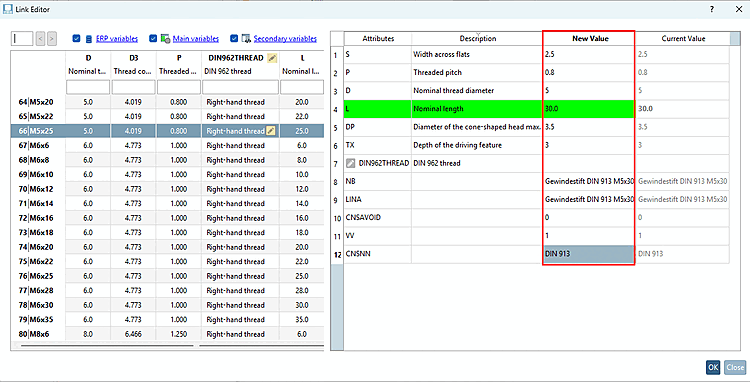
The Link Editor displays the link parameters for the selected table row and offers the following actions:
The lowercase letters in parentheses indicate the corresponding keyboard shortcut.