5.23.8.2.2. Request with simple attachment in the Part Number Manager 5.23.8.2.2.2. Procedure |  |
| Prev | Next |
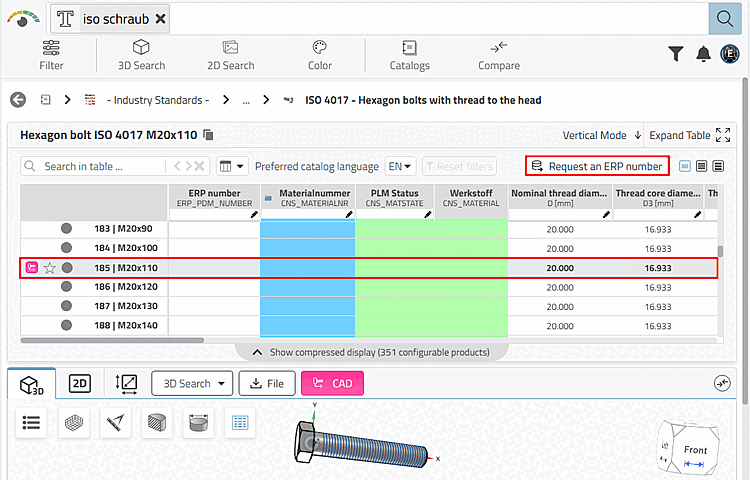
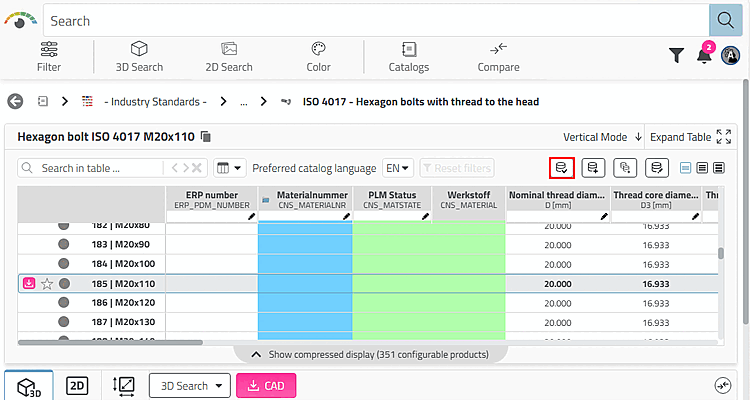
The parts request is made by clicking on the button.
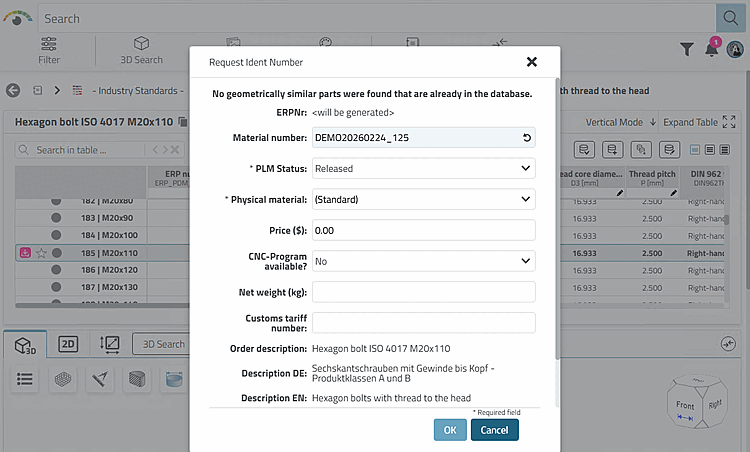
-> The Request Ident Number [Create a part ident request] dialog box opens.
The user selects a different material in the list field, enters a comment and confirms by clicking on .
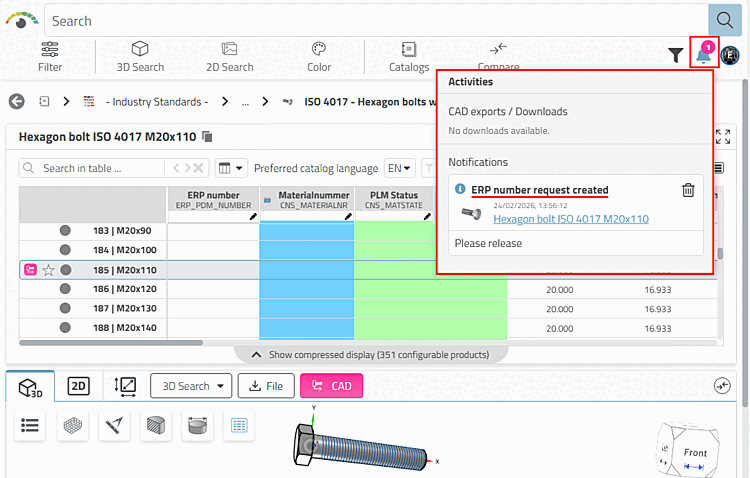
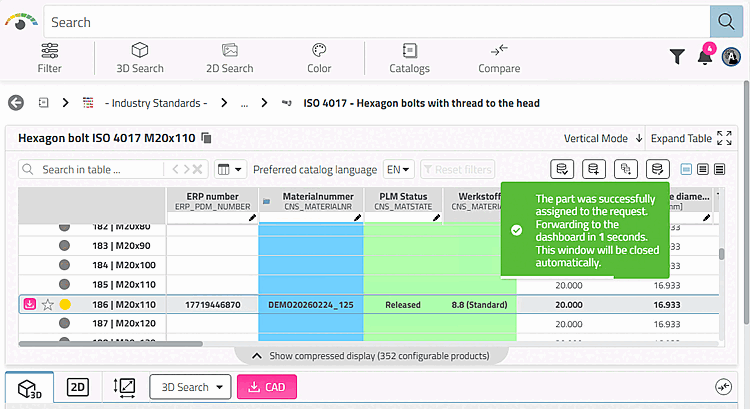
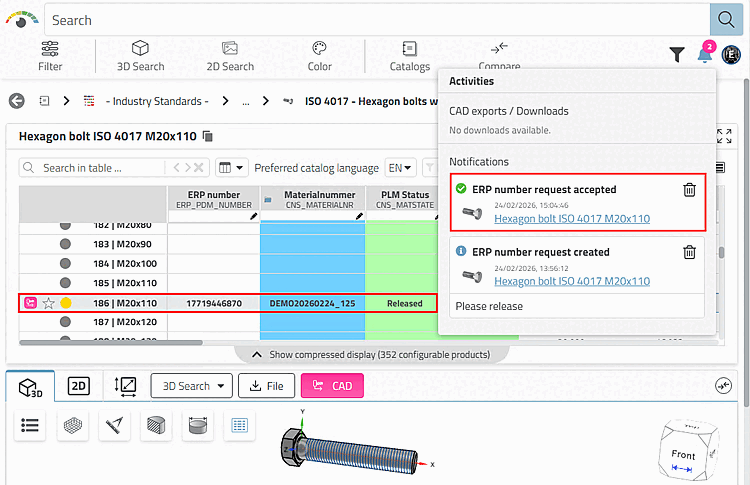
-> A confirmation of the request is displayed under Activities (possibly only after the page has been updated).
As soon as the request has been administratively processed and accepted (i.e. an ERP number has been assigned), the user receives a notification.
![Apply for an ID number [Create a part ident request]](https://webapi.partcommunity.com/service/help/latest/pages/jp/installation_ecatalogsolutions/doc/resources/img/img_a8016257cc1f4dfdb707a5867a3be29b.png)
The part requested by the user is now listed in the dashboard, in the part number manager. It can be filtered by status and date.
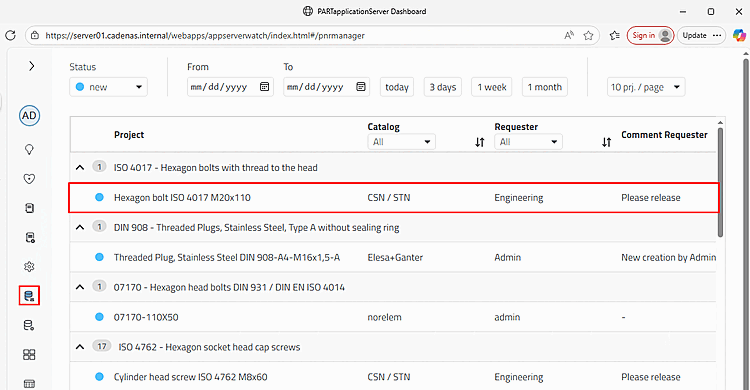
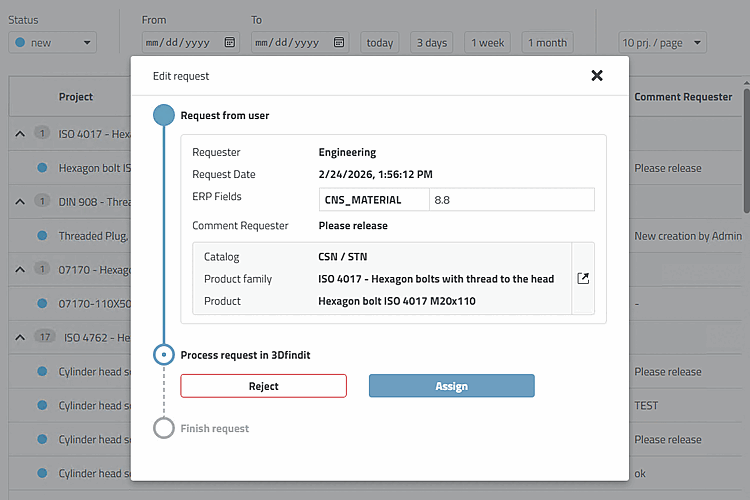
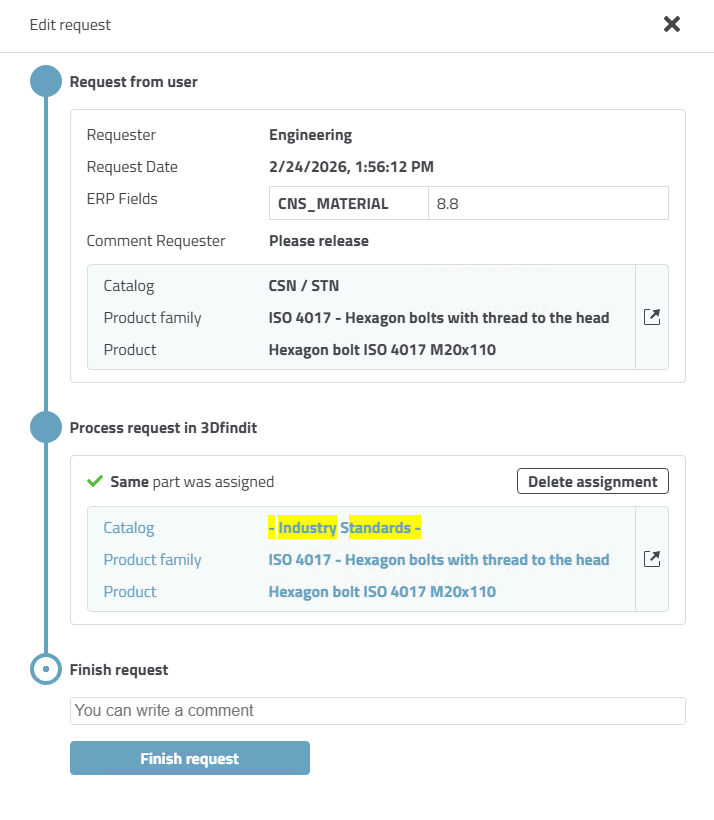
Click on the part to open the Edit request dialog box.
Click on to open the table view.
-> The Request Ident Number dialog box opens.
Make the desired settings and confirm with .
-> A confirmation message appears that the part has been successfully assigned. The system then automatically switches to the Edit request dialog.
Click on the button to confirm the request.
A comment can optionally be entered.
Click on to remove the assignment (without an entry in the LinkDB).

![[Note]](https://webapi.partcommunity.com/service/help/latest/pages/jp/installation_ecatalogsolutions/doc/images/note.png)
Once the request for part release has been accepted by the administration, standards body or a key user, the following changes take effect:
The status icon changes to a different color (e.g. yellow or green, depending on the entries in the table fields).
The part can now be exported by clicking on the button (according to the set export condition). To set up a set of rules, see Section 5.7.5.1.7, “ Export condition - plinkgroups.cfg -> Block [role name] -> Key "EXPORTRESTRICTION" ”.