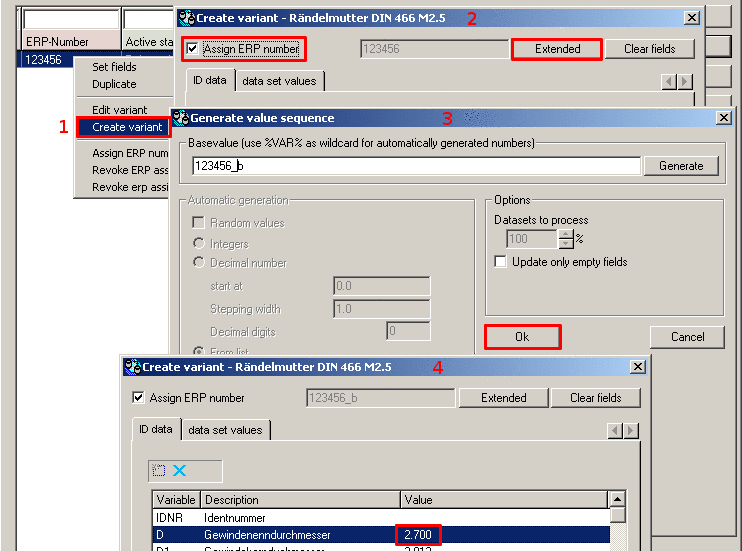
6.3.3.  Create variant in PARTlinkManager

To create a variant in PARTlinkManager, proceed as follows:

  1. Select the desired line in the PARTlinkManager.

  2. Call up the Create variant as new copy command via the context menu.

    -> The same-named dialog is opened.

  3. Activate the Assign ERP number checkbox.

    -> The Advanced [Extended] button is activated.

  4. Click the Advanced [Extended] button.

    -> The Generate value sequence dialog box opens.

  5. Enter the desired number for the variant.

  6. Confirm with Ok.

  7. The Create variant dialog box appears again.

  8. Edit the desired variable (in this example 'S')

  9. Confirm with Ok.

  10. -> The variant appears as a new line in the PARTlinkManager.

    The variant is managed in the LinkDB/PLDBDEMO with the same line ID [Line ID], but with a different line subID [Line sub ID].[12]

  11. Check the display in the PARTdataManager.

    The variants with changed thread diameters are shown next to their original geometries.


[12] Information on variants can be found at Section 6.1.3.2, “Internal treatment of variants”.