
The following describes how to apply for and import licenses for a MASTER and a BACKUP server.
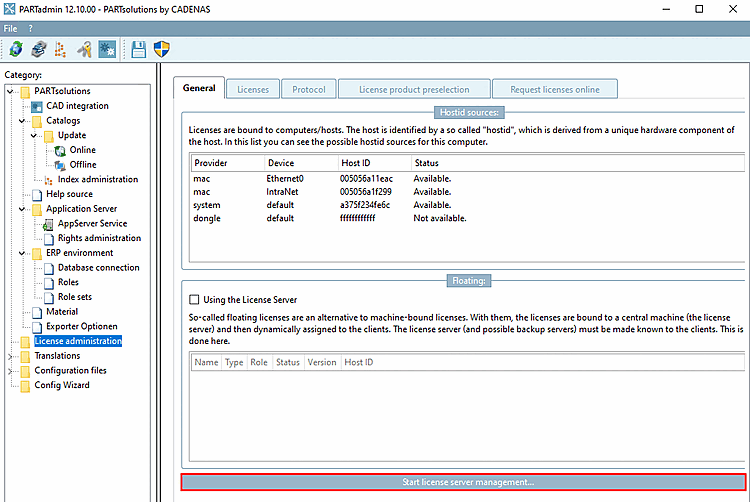
Open the license server administration from any client by clicking on the Start license server administration... [Start license server management...] button. button.
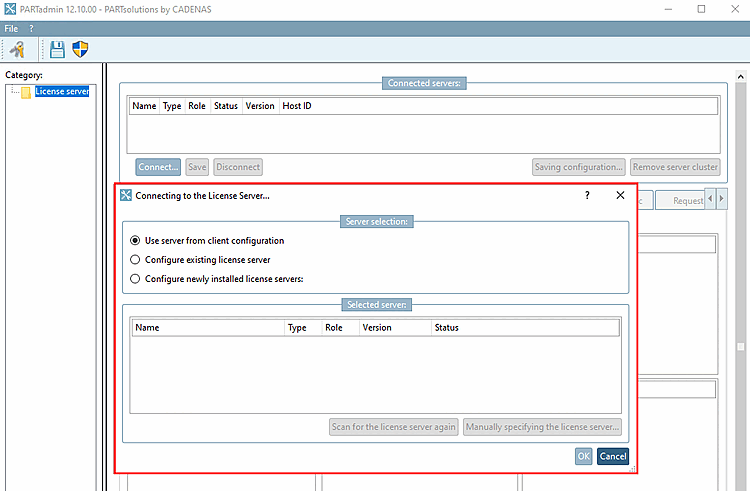
-> The Establish connection with FLM server... [Connect to FLM server...] dialog box opens.
Select the Configure newly installed license server [Configure newly installed license servers] option.
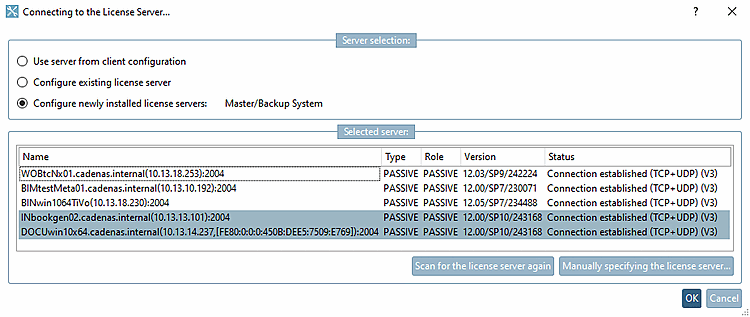
-> All license servers found in the network are displayed.
Single-click to select the servers with which you would like to create a server network and confirm with .
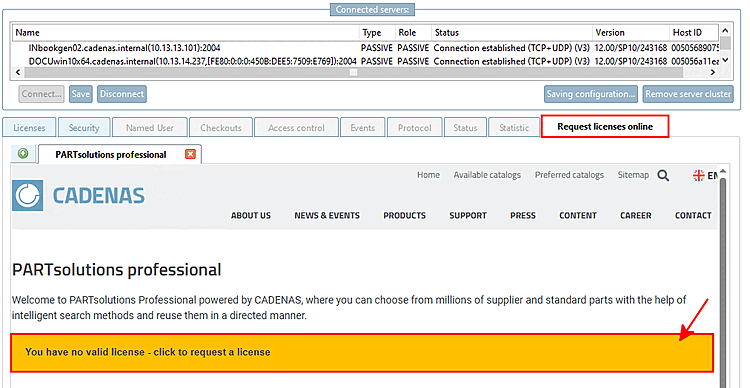
The selected license servers are displayed in the Connected servers dialog area (type and role still set to PASSIVE).
![[Note]](https://webapi.partcommunity.com/service/help/latest/pages/jp/ecatalogsolutions/doc/images/note.png)
Note After installation, a server initially has no special functionality. It is neither MASTER nor BACKUP. It is displayed as PASSIVE until a license has been installed.
See also Section 7.6, “Background information”.
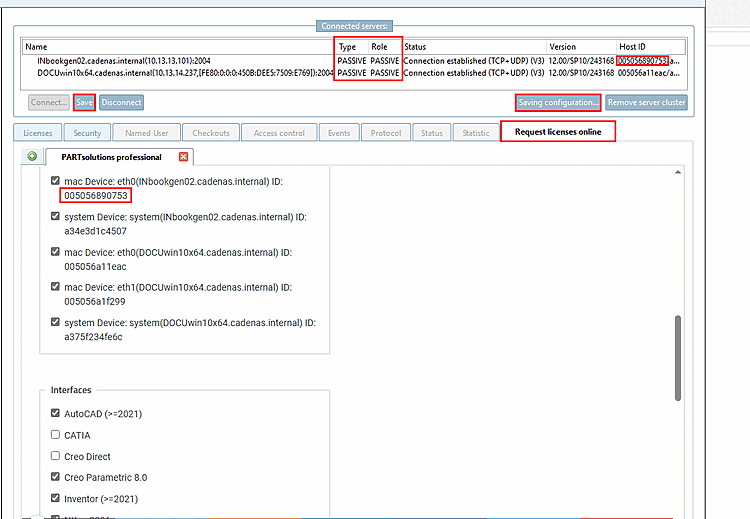
Switch to the Tabbed page Request licenses online and click on the button .
-> A corresponding form is opened.
The network card addresses of each server and the required interfaces are already entered in the form. See also Section 1.5.4.12, “Tabbed page "Apply for licenses online"” in ENTERPRISE 3Dfindit (Professional) - Administration.
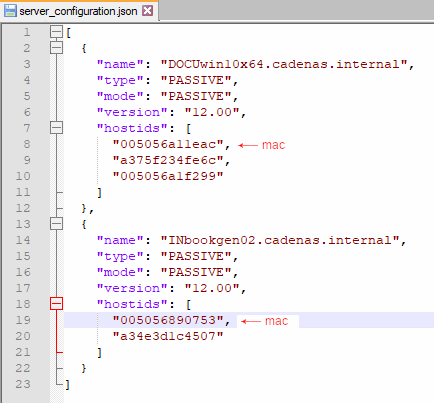
With Click on you can save a
*.json-Datei(text file), which also contains the network addresses (hostids).You can disconnect the connection to the server network with . -> The display area is now empty.
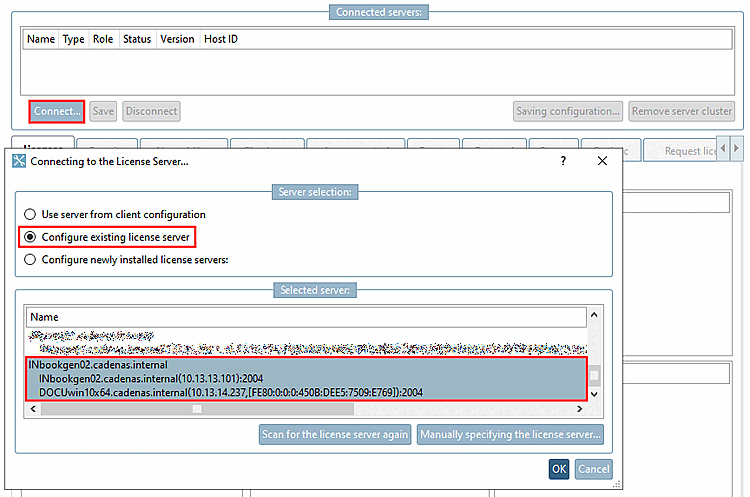
To install the license sent to you, reconnect to the cluster you have created.
-> The Establish connection with FLM server... [Connect to FLM server...] dialog box opens again.
This time, select the Configure existing license server option.
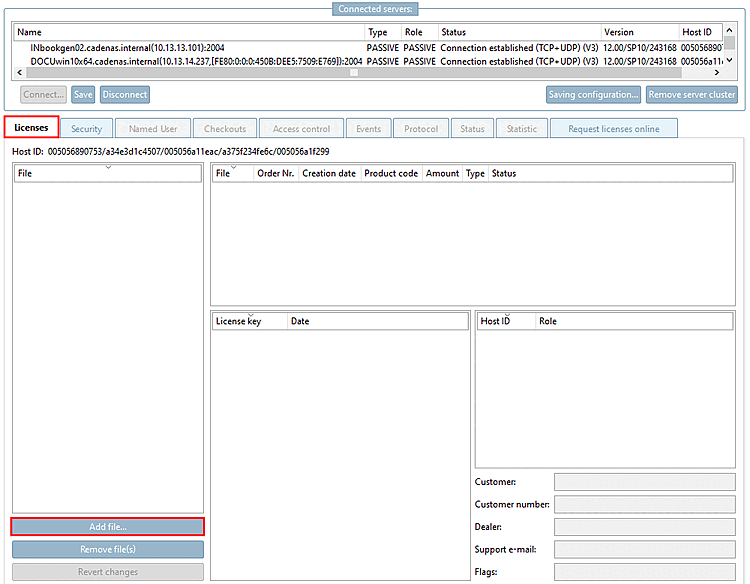
Select the Licenses Tabbed page and click on Add file.... [Add file...] In the Explorer window, select the desired license file.
-> The license is displayed in the dialog.
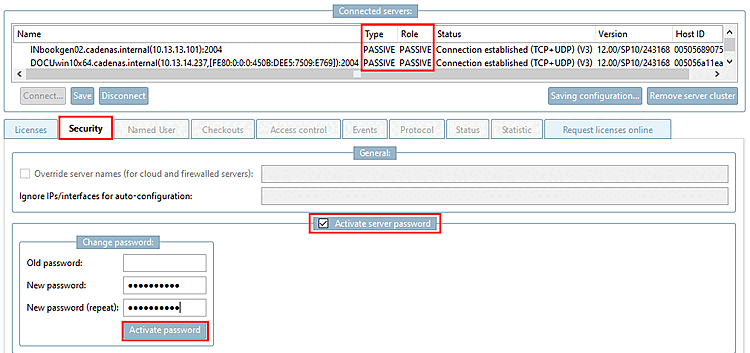
Switch to the Security Tabbed page.
You must assign a password. To do this, activate the Enable password protection [Activate server password] option. (The password may also be assigned when the hostids are read out).
Enter a password and confirm by clicking on .
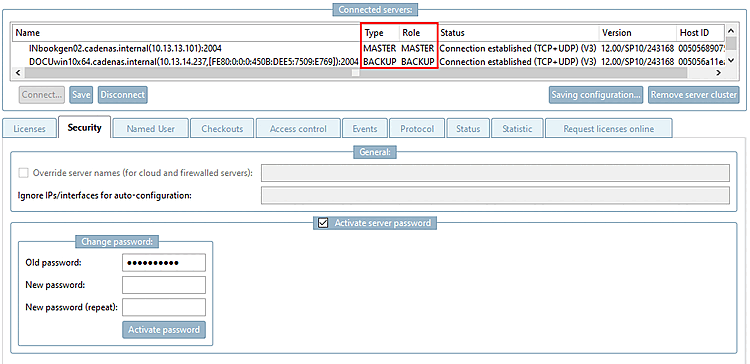
-> The license is automatically saved in the correct directory.
-> After entering the password again, the display under Type / Role changes to MASTER / BACKUP.
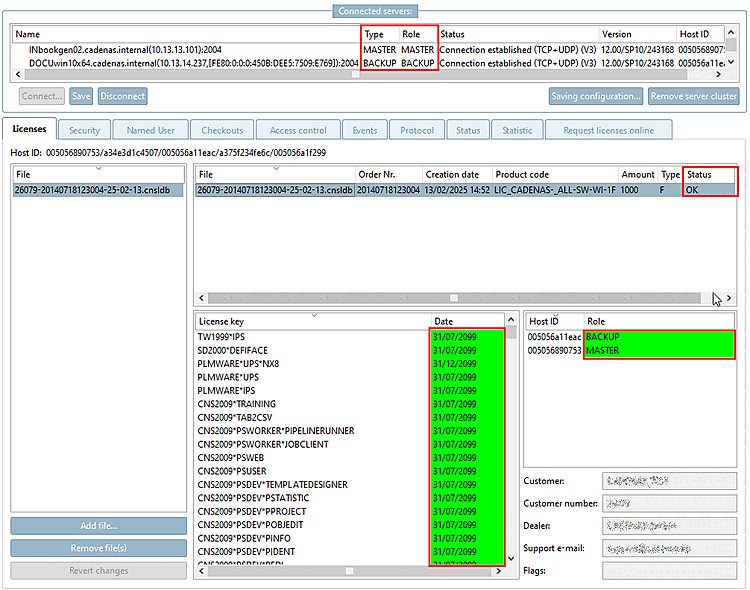
Now check the license.[6]
All individual packages and license keys should be set to OK and green.

See also Section 1.5, “ License administration ” in ENTERPRISE 3Dfindit (Professional) - Administration and Section 9.3, “Licensing ”.