10.3.  Apply for an ERP number

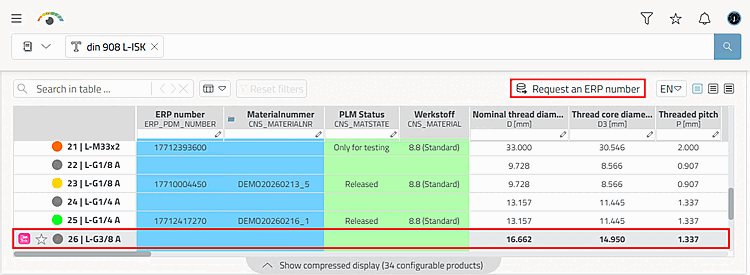
From 3Dfindit, the release for parts that are blocked for export can be requested from the responsible office.

[Note]Note

The procedure described below is only an example; other scenarios are also possible.

  1. The user selects the desired table row.
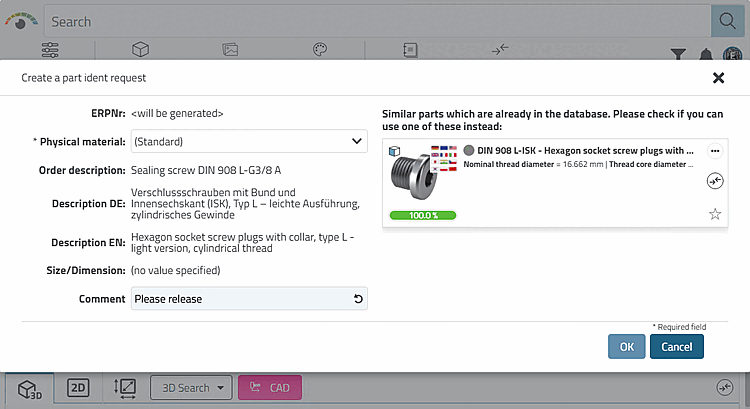
  2. Click on the Request an ERP number button to open the Create a part ident request dialog box.

    The input fields can be configured as required, so they do not necessarily look like the example here.[38]

    If similar parts are found in the database, as in this example, a corresponding message appears.

    If similar parts are found in the database, as in this example, a corresponding message appears.

    • In this example, a message appears stating that the ERP number is generated automatically.

    • Descriptions are taken from the catalog data.

    • The material can be specified via list field selection.

    • The user can enter a comment.

  3. The user now makes the desired entries and confirms by clicking OK.

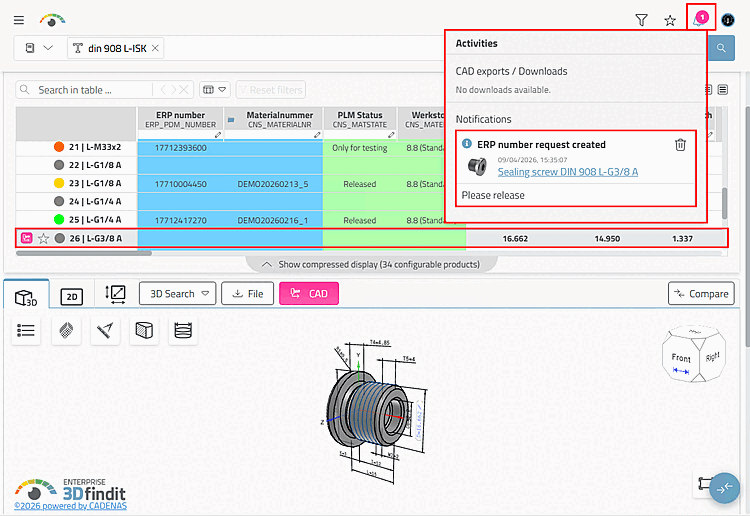
    -> The request for approval for export is now processed by the administration, standards department or a key user, depending on the respective company workflow.

    -> The following happens in 3Dfindit:

    • The notification ERP number request created appears in the Activities dialog box.

    [Note]Note

    The figure above shows a simple workflow. Only a corresponding message is displayed in the activities dialog [Activities].

    Any number of complex workflows can be established via consulting:

    • The status icon changes color to indicate that the request for the desired line is being processed.

    • The automatically generated ERP number is entered in the corresponding column.

    • The PLM Status column displays "~ Pending ~".

    • The desired material has been entered.

    • etc.

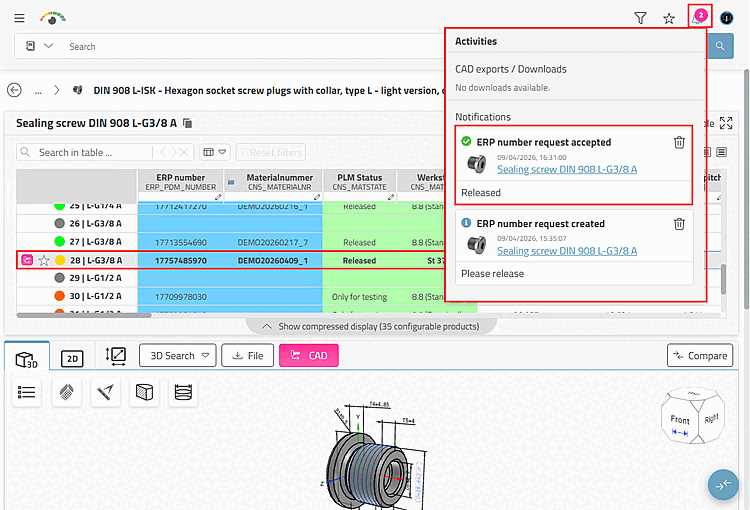
  4. As soon as the release has taken place, the following changes will take effect:

    • A corresponding notification is displayed again:

      ERP number request accepted

    • The display may also change at product and directory level.

    • The status icon changes its color (e.g. to yellow or green).

    • Released" is displayed in the PLM Status column.

    • The part can now be exported to CAD. To do this, click on the CAD button.


[38] Administrative information on this can be found in the Section 5.12, “ Design "New ident number " dialog box - erpcustom.cfg -> Block [USERDIALOG] ” in ENTERPRISE 3Dfindit (Professional) - Administration.