In addition to the two options to create a sketch or text on a surface, it is also possible to create a new layer.
![[Important]](https://webapi.partcommunity.com/service/help/latest/pages/jp/3dfindit/doc/images/important.png) | Important |
|---|---|
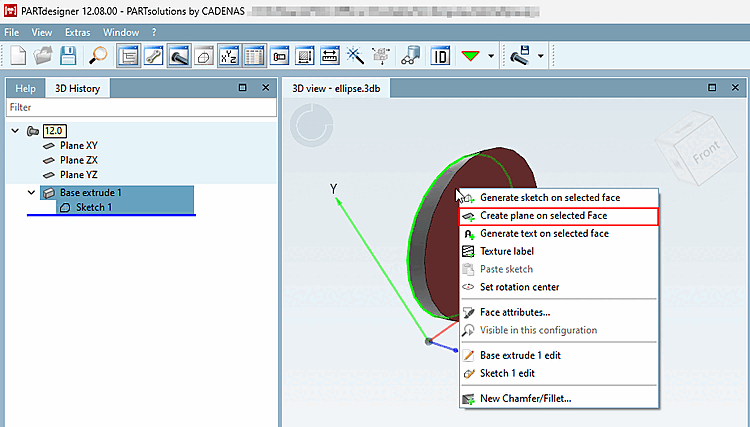
A new level can only be created on a straight surface that is not a connecting surface of a sweep. | |
Right-click on the desired area to open the context menu. Select Create new layer on selected area [Create plane on selected Face].
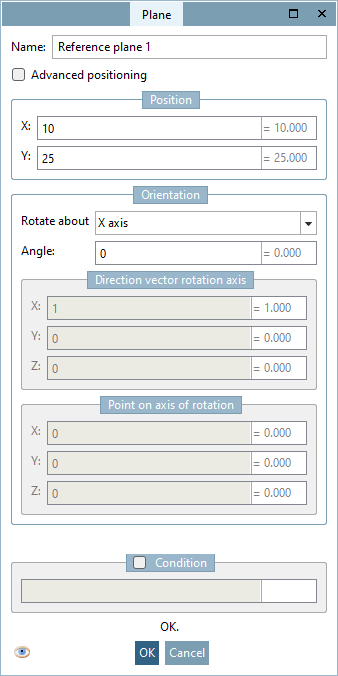
The layer [Plane] window opens, where you can define the name [Name], position [Position], orientation [Orientation] and condition [Condition]. With the Advanced positioning option, you can change the base point [Base point], the X axis [X-axis] and the Y axis [Y-axis]. While the Plane window is open, you can use the eye symbol to display or hide the visualization of the changes.
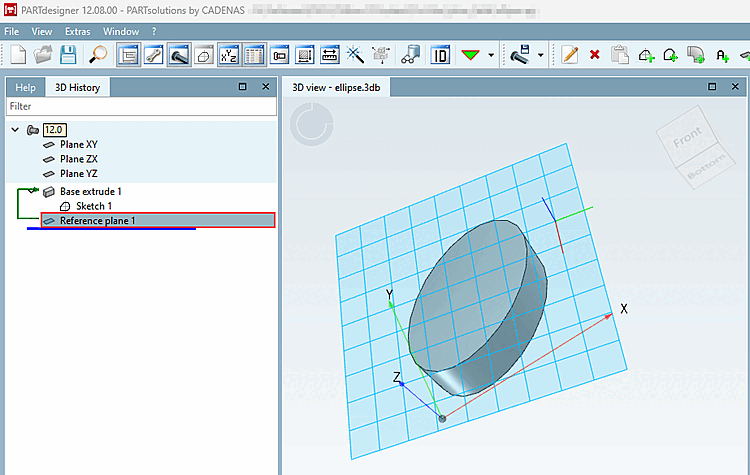
After clicking OK, the changes are applied and displayed in the 3D history [3D History] and in the 3D view. Changes can be made at any time by double-clicking on the layer in the 3D history [3D History].