3.1.11.1.  ERP toolbar

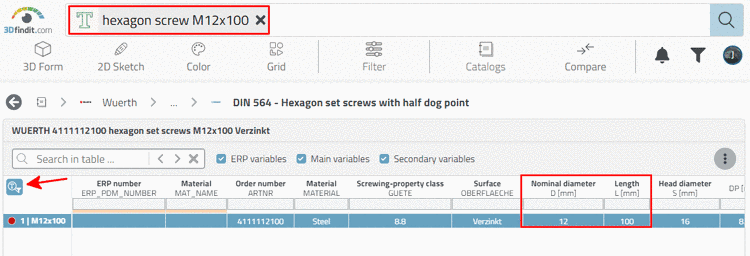
The most important feature in the PARTdataManager for the activated ERP integration is the link database [Link database] toolbar (or the ERP menu with generally identical functions).

ERP activated

ERP activated

[Note]Note

The visibility of some buttons depends on the activation status of a key in erpcustom.cfg (scripting). Others are only displayed if they are entered in menustructure_<name of application>.cfg (see Section 1.6.8, “Optimize user interface ” in PARTsolutions Administration - Manual ).

For some functions, the buttons are available for both PARTdataManager as well as 3Dfindit Enterprise. For other functions, the operation may differ slightly with identical functionality.

In the following the single buttons are explained:

  • PARTdataManager: Authenticate/change user [Authenticate/switch users]

    3Dfindit Enterprise: User authentication or user change can be carried out at any time by logging out [Log off].

    -> The login [Log in] dialog will then appear.

  • PARTdataManager select group [Select group]: As a defined user, you can select different views of the data records

    3Dfindit Enterprise: Click on Change ERP role [Change ERP Role] in the login dialog.

    Both in PARTdataManager as well as in 3Dfindit Enterprise, the Select role [Choose role] dialog box then appears.

  • Launch PARTlinkManager

  • /

    Send selection to PARTlinkManager [Send selection to Link Manager] / Cancel selection

    By double-clicking on a line in the PARTlinkManager, the view changes to PARTdataManager.

    In the PARTdataManager you can now select any line. By clicking on this line is linked to a new ERP number previously created in PARTlinkManager. The view switches back to PARTlinkManager. By clicking on you can cancel the selection process.

    The two symbols are only active if a call has been made from PARTlinkManager, otherwise they are grayed out.

  • /

    Request ERP number per e-mail

    Send e-mail

    Send e-mail

    See Section 3.1.11.10, “ Request ERP number per e-mail.

  • Add record to the [Add dataset to link database] link database or Add to [Add to link database] link database

    ...calls up the New Ident Number [new ident-no.] window.

    [Note]Note

    • The input fields can be enhanced, so that they may look different as shown in above figure.[a]

    • If a second user attempts to add a new number (on the same line or another), an error message appears.

      So the user can check, if a part's new creation is really necessary or if the already existing is sufficient.

      Example from PARTdataManager: User 1 has added an ERP number for table row 136. User 2 wants to add a number for another row (or the same). -> An error message is displayed. Solution: The table has to be reloaded that the real state is displayed.

      Example from PARTdataManager: User 1 has added an ERP number for table row 136. User 2 wants to add a number for another row (or the same). -> An error message is displayed. Solution: The table has to be reloaded that the real state is displayed.

      Example in 3Dfindit: The process is identic in principle. However, in 3Dfindit, the table is automatically reloaded.

      Example in 3Dfindit: The process is identic in principle. However, in 3Dfindit, the table is automatically reloaded.

      Example in 3Dfindit: Error message

      Example in 3Dfindit: Error message

    • Duplicate check

      If a user attempts to add another characteristic on an existing row (with number), depending on administrative settings a respective message appears, which serves to avoid the creation of a possible duplicate.

      In principle, the use of an already existing characteristic may be ok, because, for example, another surface or material shall be chosen. Which fields are involved in the check depends on administrative settings.

    • In the case of more fundamental errors, such as during export, the following message may also be displayed:

    [a] Administrative information on this can be found in the Section 4.11, “ Design "New ident number " dialog box - erpcustom.cfg -> Block [USERDIALOG] ” in PARTsolutions Administration - Manual .

  • Add dataset to link database (variant)

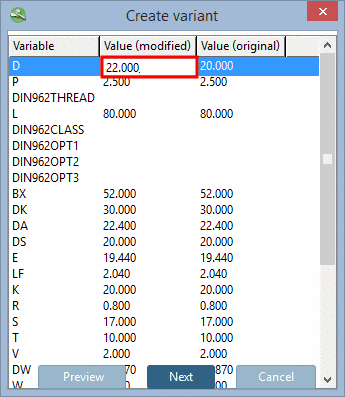
    Choose a data set, which is the very next to the variable to be changed.

    After clicking the button, the Create variant window opens.

    All variables of the component are listed.

    In this example L has been set from value 130 to 135.

    The New ident number [new ident-no.] dialog then appears as for Add record to link database [Add dataset to link database] (see above).

    As a result, the created variant is also displayed in the PARTdataManager is displayed.

    When variants are created, possibly these are not sorted correctly in PARTdataManager (see fig. above). However you can determine the scheme of sorting for the currently opened project in a special dialog. So a manual editing of the PRJTABLE is not necessary. On this see under Section 3.1.11.13, “Line sorting in PARTdataManager ”.

  • Set sort order for this project:

    On this see under Section 3.1.11.13, “Line sorting in PARTdataManager ”.

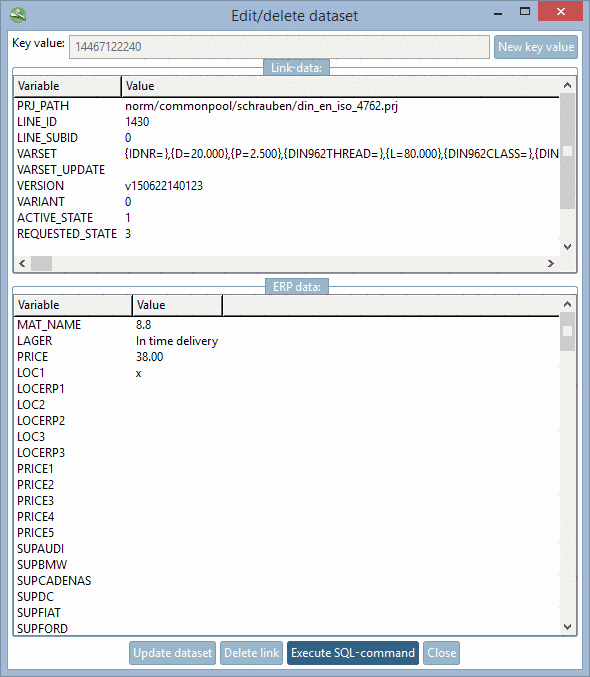
  • Edit/delete data [Edit/delete dataset] record:

    After clicking on the button, the dialog box Edit/delete data record [Edit/delete dataset] appears.

    Edit/delete dataset

    Edit/delete dataset

    • New key value

      Change the ERP_PDM_NUMBER if desired.

    The data view is divided into link data [Link-data] and ERP data.

    • Update dataset

      Click on the value to be changed, change it accordingly and press the Update record [Update dataset] button.

    • Delete link

      Deletes the data of the LINKTABLE.

      Afterwards follows an inquiry whether or nor the data of the ERPTABLE should be kept. Confirm/deny the inquiry accordingly.

    • Execute SQL-command

      Opens the window of the same name.

      In the input field, enter a SQL command.

      Example:

      SELECT * FROM ERPTABLE WHERE MAT_NAME='8.8'

      Define the maximum number of rows in the result.

      Then click Execute.

      [Note]Note

      Using Browse ... you can display the table names and a selection of SQL commands.

      Execute SQL-command

      Execute SQL-command

    • Close

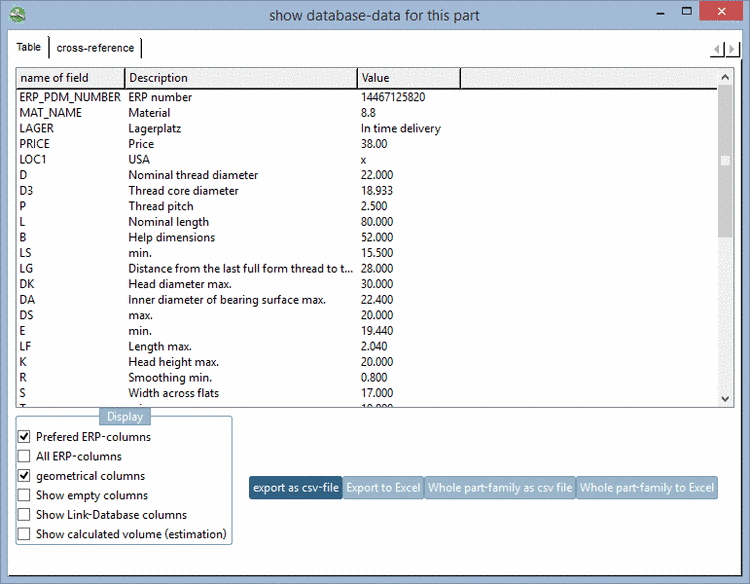
  • Show database data for this part [show database-data for this part] :

    The window shows geometric data as well as ERP data.

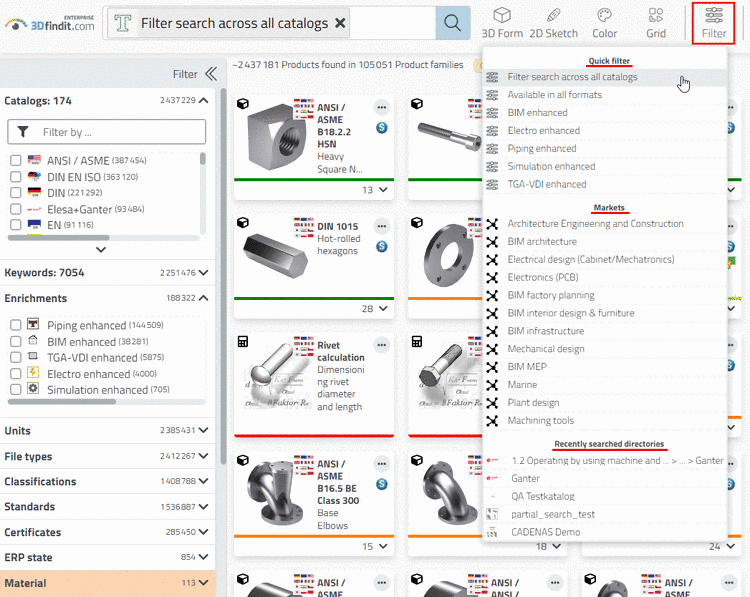
  • Preferred rows On/Off [Preferred rows on/off] :

    This function controls both the display of catalogs, directories and projects in the index tree and the display of characteristics in the table.

    The search results are also filtered when the button is activated. These must also comply with the preferred series condition when the button is activated.

    After activating the Preferred rows On/Off [Preferred rows on/off] button, a) only "green" rows [Preferred rows on/off] are displayed[103] Catalogs, directories and projects are displayed and b) only rows that have an entry in a defined column (this is often the column for the article number). In other words, only green rows are displayed in the table. The red rows are hidden.[104]

    Information on defining the condition can be found under Section 4.7.3.1.2, “ Preferred series - plinkgroups.cfg -> Block [Role_name] -> Key "PREFRANGE" ” in PARTsolutions Administration - Manual

    [Note]Note

    You can combine the filtering with a search! If the filter is activated, then the search concerns only parts, which have not been filtered!


[103] Green refers to the standard definition. The statement also applies to any other definition of the preferred rows.

[104] Green/red or green/semi-transparent again refers to the standard definition.