For 3Dfindit without ERP integration, an additional "virtual" CNSMAT column is displayed. Select the desired material there before exporting parts.
![The "Enter value [Enter value] " dialog box opens after clicking in the CNSMAT column.](https://webapi.partcommunity.com/service/help/latest/pages/jp/partsolutions_admin/doc/resources/img/img_3d78a022a87e42b7af161ed9631aa7a1.png)
The following overview shows the interdependencies:
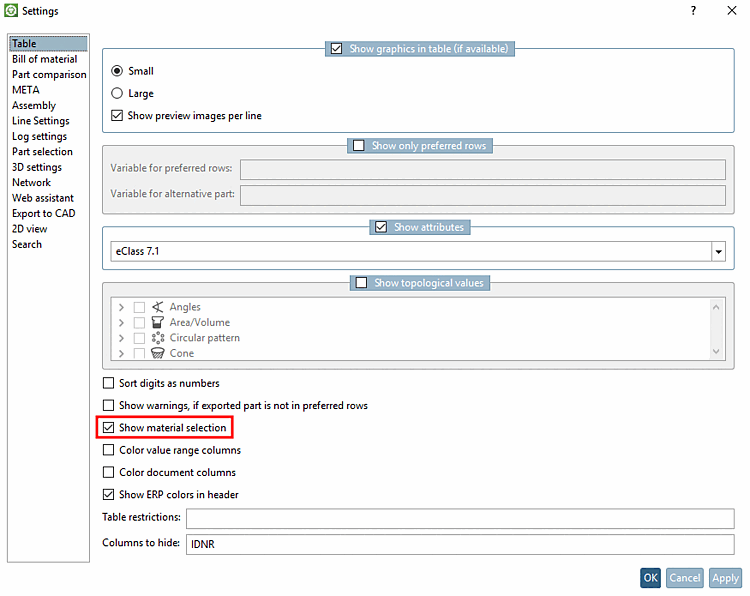
To display the CNSMAT column in the table, you must activate the option Show material selection under PARTdataManager -> Tools [Extras] -> Settings [Preferences] -> Table to activate the Show material selection option.
Configuration files relating to 3Dfindit
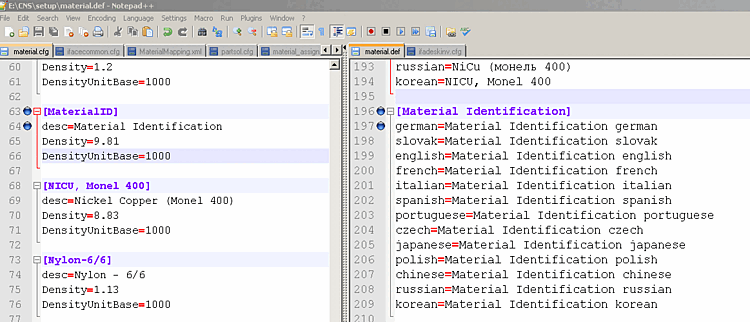
The 3Dfindit materials selectable in the CNSMAT column are stored in the configuration file
material.cfg.Following the given structure you can add own materials anytime.
The file contains the translation terms of the materials. These terms are displayed in the PARTdataManager displayed.
In the PARTdataManager open the Enter value dialog before exporting by clicking in the corresponding field in the CNSMAT column.
The translation of the material stored in material.def is displayed.
Configuration files relating to the CAD system (here for Inventor as an example)
Ensure that all 3Dfindit materials used are correctly mapped to the corresponding CAD system materials.
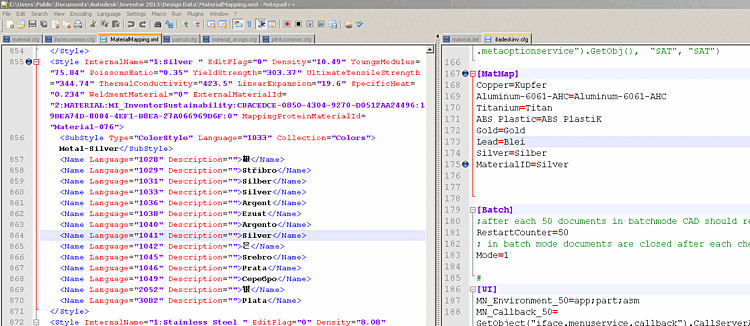
On the left side: Inventor/Design Data/MaterialMapping.xml - On the right side: $CADENAS_SETUP/ifadeskinv.cfg
$CADENAS_SETUP/If<cadname>.cfg
In the [MatMap] block, the 3Dfindit material name (to the left of the actual-equal sign) is linked to the CAD material name (to the right of the actual-equal sign).
Public Documents \ AutoDesk \ Inventor \ Design Data – MaterialMapping.xml
The Inventor XML file with all materials available in Inventor. Here you will find the internal Inventor material name, which you must enter in
$CADENAS_SETUP/ifadeskinv.cfgin the [MatMap] block. The internal name is directly marked as such:<Style InternalName= „<NUMBER>:<MATERIALNAME> “
Alternatively you can export a part to Inventor, there, call up the iProperties, and here, on the tabbed page „Physical“, look up the exact material name in the list field.
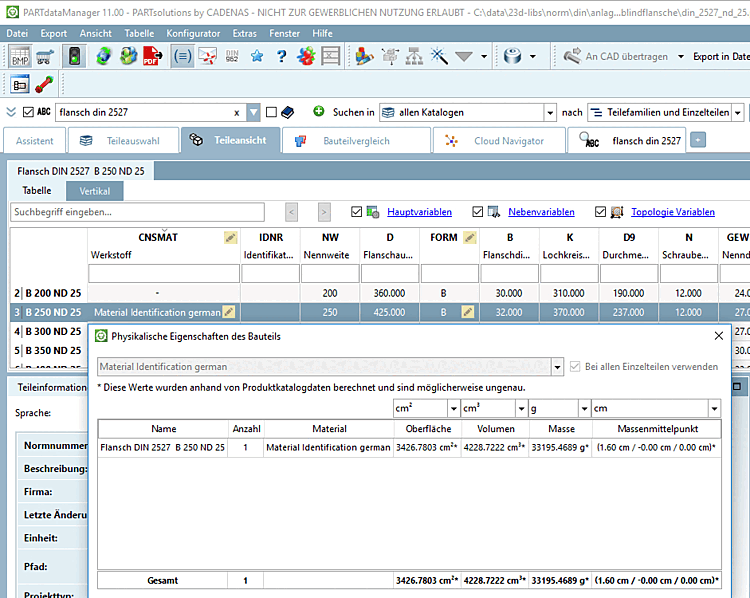
Look up physical properties at PARTdataManager
PARTdataManager -> Extras menu -> Physical properties of the component [Physical properties of the part]
If you have entered the corresponding values in the 3Dfindit configuration files mentioned above for a material you have added yourself, the density and the other physical properties are now calculated correctly in the PARTdataManager.
Material attribute in the CAD system
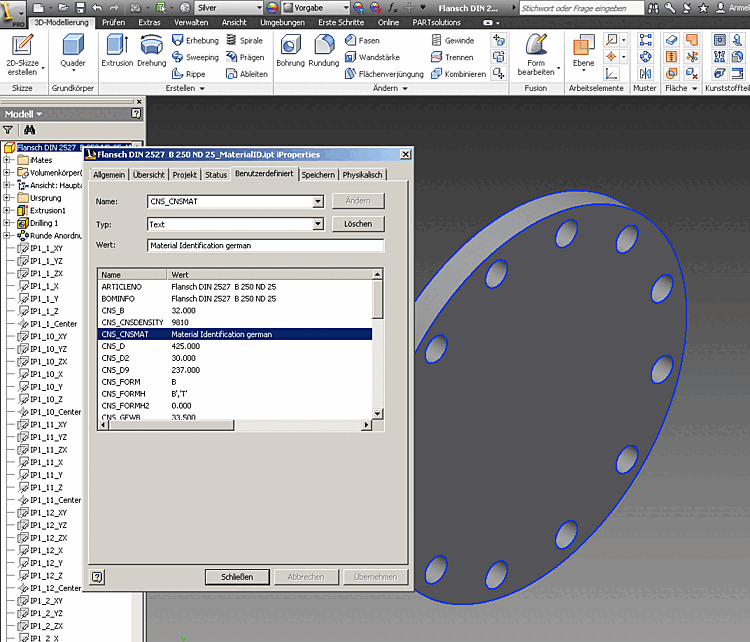
Example by reference to Inventor: Inventor iProperties -> tabbed page "Custom"
The following figure shows the respective translated material name when selecting CNS_CNSMAT (here exemplified the German name).
Physical properties of the transferred component in the CAD system
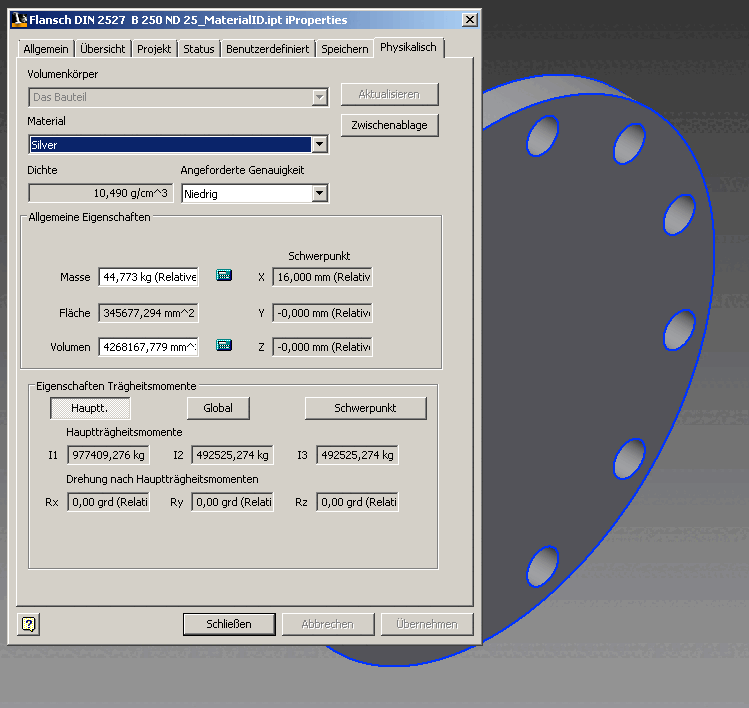
Example by reference to Inventor: Inventor iProperties –> tabbed page "Physical"
The following figure shows that the 3Dfindit material was correctly mapped to the Inventor material and the mass was calculated using the material values from Inventor.
![[Important]](https://webapi.partcommunity.com/service/help/latest/pages/jp/partsolutions_admin/doc/images/important.png)