

![[Note]](https://webapi.partcommunity.com/service/help/latest/pages/jp/partsolutions_admin/doc/images/note.png) | Note |
|---|---|
When running an installation never do it being connected via network but only directly on the respective computer! | |
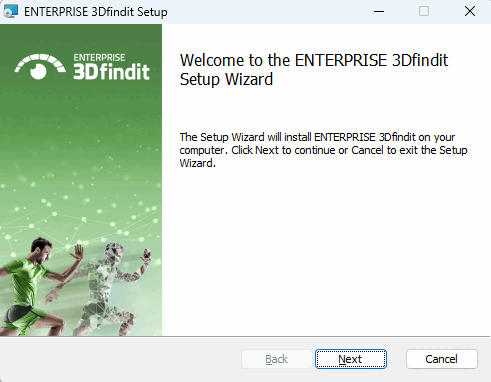
The following figures are oriented to an example of a server installation or single-user installation.
By default
the installation is carried out under C:\Program Files\ENTERPRISE
3Dfindit.
Close all open programs and services before running the setup program.
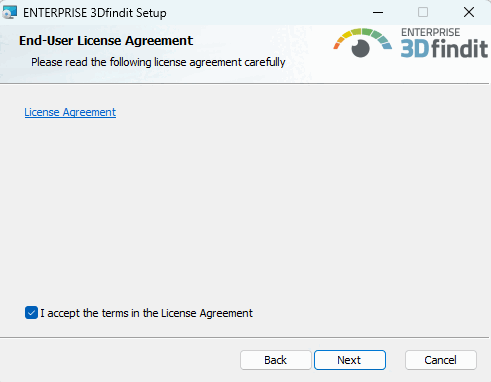
Accept the terms of the license agreement and click .
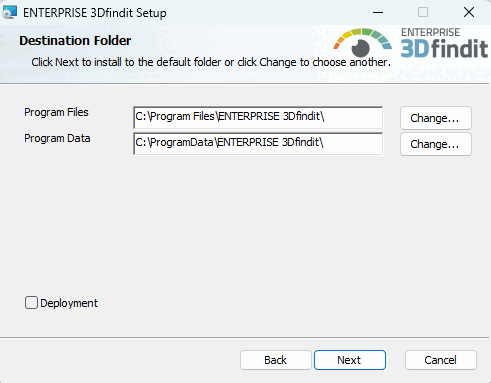
Specify the folders in which the software is to be installed.
The button allows you to select a folder on the hard disk other than the default one (if necessary).
![[Important]](https://webapi.partcommunity.com/service/help/latest/pages/jp/partsolutions_admin/doc/images/important.png)
Important Program Files and Program Data must be independent of each other!
The 1st rule must not be circumvented in the second dialog of Destination Folder.
CADENAS_DATA, CADENAS_POOL, CADENAS_SITESETUP, CADENAS_USER must not be in or under the "Program Files " folder (software installation)!
Reason: The software directory is completely provided by MSI and additional files must be removed beforehand to avoid conflicts with old or obsolete files.
Example for correct folder structure:
Program Files=c:\cad\software
CADENAS=c:\cad\software
CAENAS_DATA=c:\cad\data  <-- ok ..
CADENAS_POOL=c:\cad\pool <-- ok ..
Example for wrong folder structure:
Program Files=c:\cad\
CADENAS=c:\cad
CAENAS_DATA=c:\cad\data  <-- error
CADENAS_POOL=c:\cad\pool <-- error
With wrong folder structure a respective message is displayed.
POOL must never be below DATA!
Caution! When using Deployment, you are completely free to set the directory structures. However, this overrides all checks by the software!
Deployment can/should also be used for client distributions. An image created by an admin/consultant can then be distributed to the clients via copy or share. Only the files are copied without system entries. Any number of copies can be created. (Make sure to select a different target directory each time)
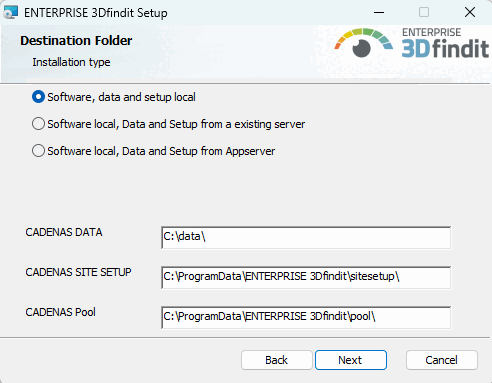
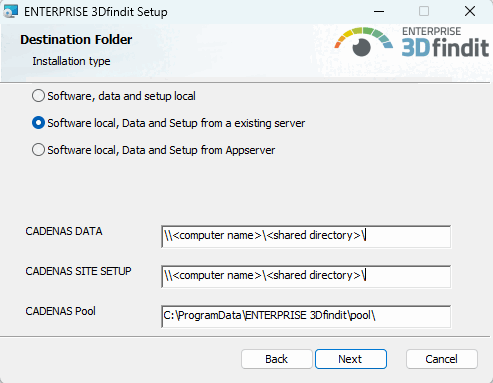
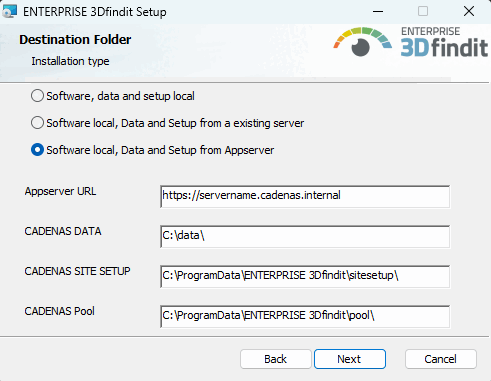
Select one out of the following three options:
Software, data and setup locally: The option could be used for a pure single-user installation or a server installation, for example. If necessary, adjust the installation paths of CADENAS DATA, CADENAS SITE SETUP and CADENAS Pool.
Example the
start.env: The path under CADENAS_DATA has been modified.[ENVIRONS] CADENAS=%DirOfThisFile% CADENAS_SETUP=C:\ProgramData\PARTsolutions\setup CADENAS_DEFAULTUSER=$CADENAS_SETUP\user\default_user CADENAS_SITESETUP=C:\ProgramData\PARTsolutions\sitesetup CADENAS_USER=%UserAppData%\PARTsolutions\user CADENAS_LICENSE=$CADENAS_SITESETUP\lic CADENAS_POOL=C:\ProgramData\PARTsolutions\pool CADENAS_DATA=C:\data\
Local software, data and setup from an existing server [Software Local, data and setup from an existing server]: If a server installation has been carried out and the directories CADENAS_DATA and CADENAS_SETUP have been released there, a client can be installed where the software is located locally but the other directories are referenced.
Local software, data and setup from the app server [Software Local, data and setup from the app server]: Use this option for a client installation.
CADENAS_DATA and CADENAS_SETUP are configured via the app server, so that only the app server URL has to be entered. Adjust the installation path of CADENAS Pool if necessary.
Explanations on different use cases can be found under Section 4.5.1, “Different installation scenarios”.
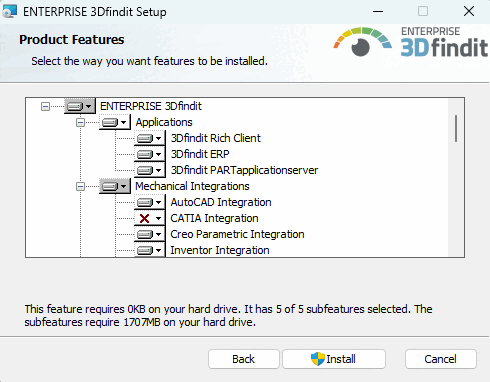
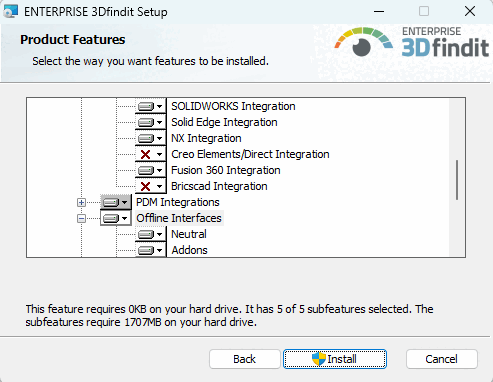
Select the desired features for your installation.
This package always includes the 3Dfindit PARTapplicationserver and 3Dfindit ERP packages.
Note Special JDBC drivers for MSSQL and Oracle are NOT provided as part of the ENTERPRISE 3Dfindit setup. Please download them from the relevant websites yourself:
https://www.oracle.com/database/technologies/appdev/jdbc-downloads.html
sqljdbc_12.2\deu\mssql-jdbc-12.2.0.jre8.jarresp.sqljdbc_12.2\deu\mssql-jdbc-12.2.0.jre11.jarhttps://learn.microsoft.com/de-de/sql/connect/jdbc/download-microsoft-jdbc-driver-for-sql-server?view=sql-server-ver16
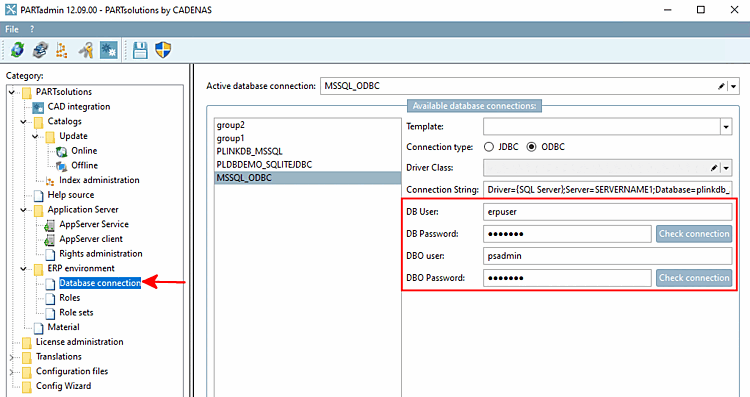
Detailed information can be found in the ENTERPRISE 3Dfindit Administration Manual under Database connection.
All ENTERPRISE 3Dfindit applications are included, in particular 3Dfindit and PARTadmin, but also PARTlinkManager, PARTdataCenter, etc.
For basic functionality of a pure ENTERPRISE 3Dfindit client, neither this point nor PARTsolutions Appserver and PARTsolutions ERP must be installed. (See also Section 4.5.1, “Different installation scenarios”.)
Is explicitly required when setting up the app server itself. The 3Dfindit Rich Client option is not necessarily required in this case, as PARTadmin is already included in the 3Dfindit PARTapplicationserver option.
Furthermore the PARTapplicationserver is explicitly used for a single-user installation with 3Dfindit user interface.
Details on the PARTapplicationserver installation can be found under Section 4.5.3, “ PARTapplicationServer installation ”.
Professional parts management with PDM/ERP/PLM integration[1] This package is always required for PARTsolutions. It is therefore also an integral part of the 3Dfindit Rich Client package. PARTlinkManager, for example, is then installed.
The explicit selection of this package alone may be useful if PARTlinkManager is to be installed on a client.
Basics on connecting the link database and enabling the ERP integration can be found below under Section 4.5.2, “ENTERPRISE 3Dfindit ERP integration”.
Activate the integrations that you have purchased.
Activate the integrations that you have purchased.
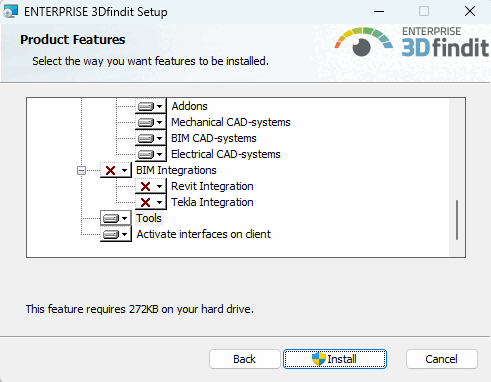
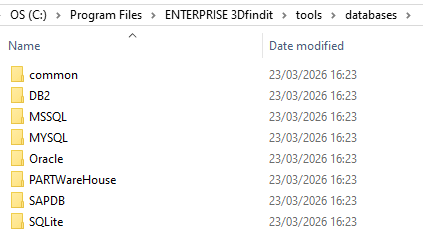
Tools: Contains database scripts required for setting up the ERP environment and vbs files for special tasks.
You can also use the scripts to set different rights for the standard user ("erpuser") and the admin user ("psadmin").
CREATE USER IF NOT EXISTS 'erpuser' IDENTIFIED WITH mysql_native_password BY 'erpuser';

GRANT SELECT, INSERT, UPDATE, DELETE ON partlinkdb.ERPTABLE to erpuser;
GRANT SELECT, INSERT, UPDATE, DELETE ON partlinkdb.LINKTABLE to erpuser;
GRANT SELECT, INSERT, UPDATE, DELETE ON partlinkdb.CLASSFOLDERTABLE to erpuser;
GRANT SELECT, INSERT, UPDATE, DELETE ON partlinkdb.CLASSTABLE to erpuser;
GRANT SELECT, INSERT, UPDATE, DELETE ON partlinkdb.PRJTABLE to erpuser;
GRANT SELECT, INSERT, UPDATE, DELETE ON partlinkdb.PLMTABLE2 to erpuser;
GRANT SELECT, INSERT, UPDATE, DELETE ON partlinkdb.PLM_HIERARCHY to erpuser;
GRANT SELECT, INSERT, UPDATE, DELETE ON partlinkdb.CNSSEQ to erpuser;
GRANT SELECT, INSERT, UPDATE, DELETE ON partlinkdb.TREETABLE to erpuser;
GRANT SELECT, INSERT, UPDATE, DELETE ON partlinkdb.LOGTABLE to erpuser;
GRANT SELECT, INSERT, UPDATE, DELETE ON partlinkdb.EXPORTTABLE to erpuser;
Der Admin muss auch Spalten-Definitionen in der ERPTABLE ändern können.
CREATE USER IF NOT EXISTS 'psadmin' IDENTIFIED WITH mysql_native_password BY 'psadmin';

GRANT ALTER, SELECT, INSERT, UPDATE, DELETE ON partlinkdb.ERPTABLE to psadmin;
GRANT SELECT, INSERT, UPDATE, DELETE ON partlinkdb.LINKTABLE to psadmin;
GRANT SELECT, INSERT, UPDATE, DELETE ON partlinkdb.CLASSFOLDERTABLE to psadmin;
GRANT SELECT, INSERT, UPDATE, DELETE ON partlinkdb.CLASSTABLE to psadmin;
GRANT SELECT, INSERT, UPDATE, DELETE ON partlinkdb.PRJTABLE to psadmin;
GRANT SELECT, INSERT, UPDATE, DELETE ON partlinkdb.PLMTABLE2 to psadmin;
GRANT SELECT, INSERT, UPDATE, DELETE ON partlinkdb.PLM_HIERARCHY to psadmin;
GRANT SELECT, INSERT, UPDATE, DELETE ON partlinkdb.CNSSEQ to psadmin;
GRANT SELECT, INSERT, UPDATE, DELETE ON partlinkdb.TREETABLE to psadmin;
GRANT SELECT, INSERT, UPDATE, DELETE ON partlinkdb.LOGTABLE to psadmin;
GRANT SELECT, INSERT, UPDATE, DELETE ON partlinkdb.EXPORTTABLE to psadmin;
In PARTadmin, under Database connection, the connection can be checked.
Details on all systems can be found in the readme files of the individual directories.
Activate interfaces on the client: The option is activated by default. If you deactivate the option, you have to activate the desired interfaces manually later in PARTadmin under category CAD integration. See also Section 1.4.2, “ CAD integration ” in ENTERPRISE 3Dfindit (Professional) - Administration.
Batch scripts are available at
...\software\install\scriptsthat can be executed locally at any time to activate/deactivate all interfaces. These can also be used administratively in the course of software distribution with deployment.
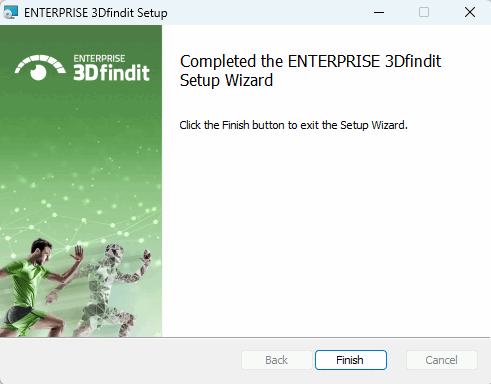
As soon as the installation is complete, the following message appears. Click .
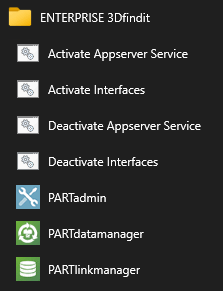
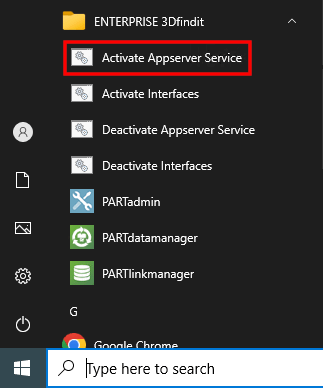
After the installation is complete, the corresponding start menu entries are displayed. The Activate Interfaces / Deactivate Interfaces links start the batch scripts mentioned above.
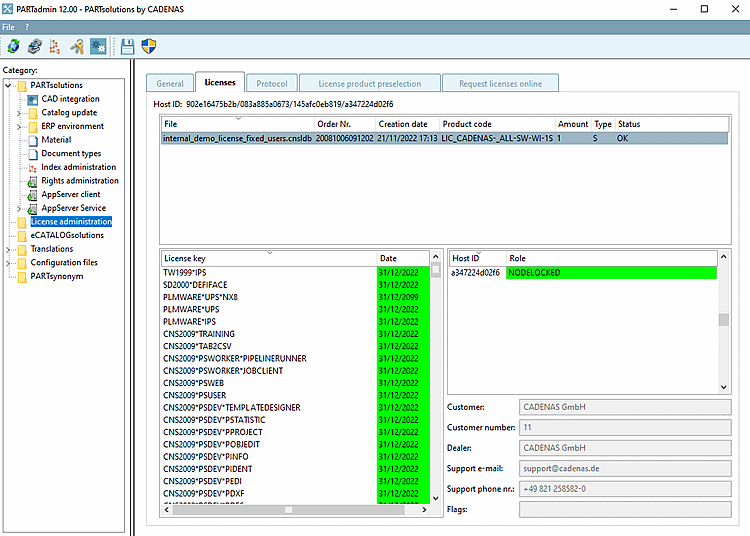
Import an already received license (which also contains the PARTapplicationServer) via PARTadmin under Tabbed page Licenses > Add file...:
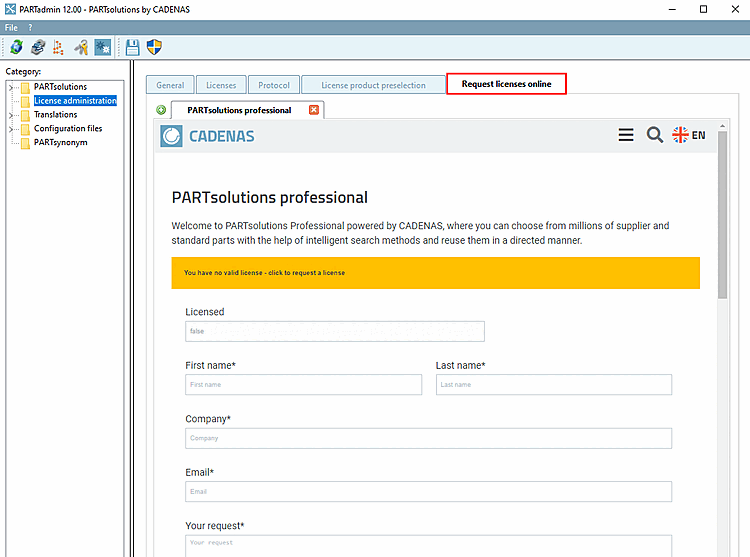
Otherwise, you can apply for a license on the Apply for licenses online [Request licenses online] tab.
Details on licensing can be found at Section 9.3, “Licensing ”.
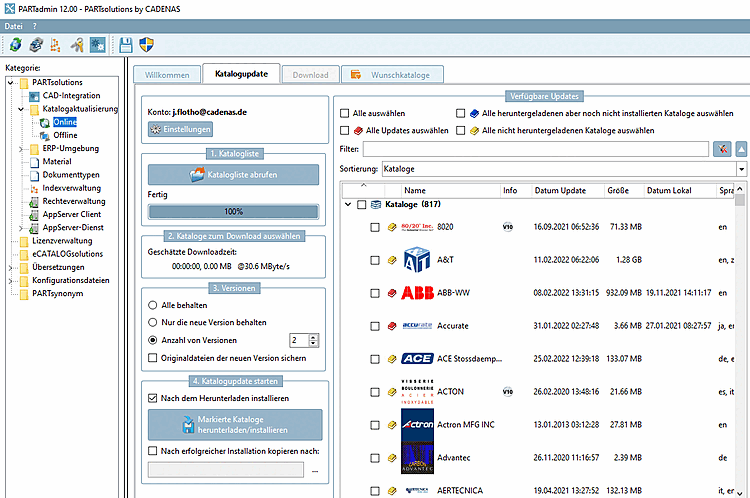
Install the required catalogs and classifications via PARTadmin.
Details can be found under Section 1.4.3.1, “ Catalog update Online ” in ENTERPRISE 3Dfindit (Professional) - Administration.
Whenever a central PARTapplicationServer is in use, it must be started as a service.
To do this, click on the Activate Appserver Service entry in the Start menu.
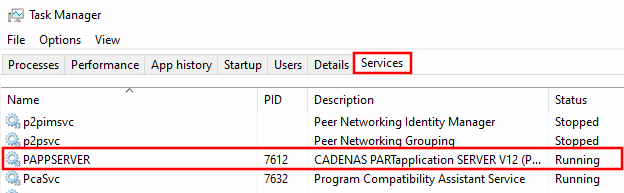
Check in the Task Manager under Services whether the PAPPSERVER entry is present and the status is Running.
![Category "CAD integration [CAD integration] "CAD integration](https://webapi.partcommunity.com/service/help/latest/pages/jp/partsolutions_admin/doc/resources/img/img_a9bd14203fcb450c9448605a0903344b.png)
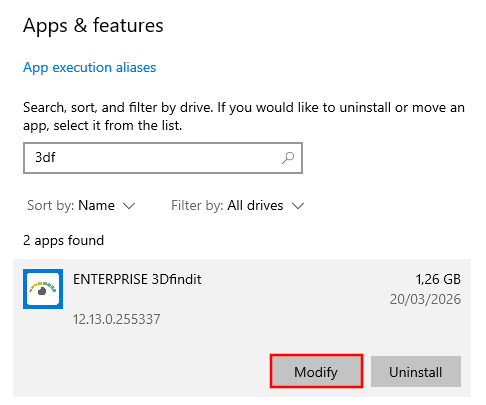
In addition to the instructions in this chapter, please also note the information under Section 5.24, “Important notes on updating to V12” in ENTERPRISE 3Dfindit (Professional) - Administration.
[1] Parts management with PDM/ERP/PLM integration is the linking of catalog data with your data in the ERP/PLM system. This allows role-based approvals and views to be controlled and data from your database system to be displayed in PARTsolutions for the user. The database system must be provided by the customer.