 |
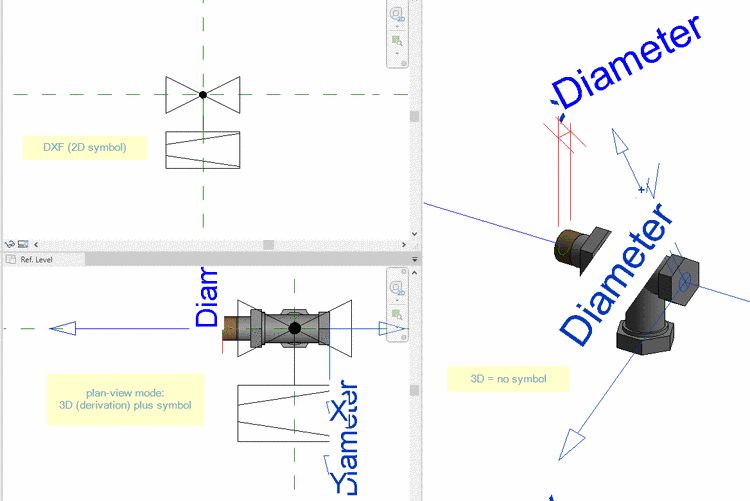
With appropriate interface, when exporting 2D/3D formats other 2D formats can be transferred in addition.
The following example will show this with Revit. Besides the 3D file an additional symbol is transferred and placed. Just as well different drawings, for example, could be transferred in addition. The described process of setting additional export formats and of classifying may automatically happen just as well.
Select the project to which you want to assign a certain symbol as additional export format. (In this example "c2fvvi412020.prj".)
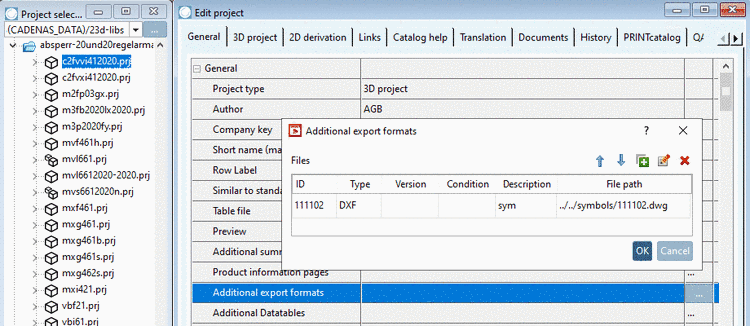
In PARTproject -> Edit project -> tabbed page General -> menu item General -> Additional export formats, click on the search button .
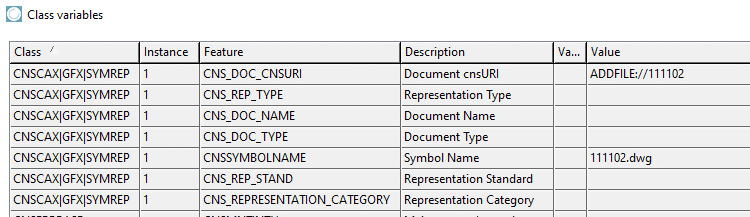
Under File path, enter the path to the desired DXF/DWG file. (Here "../../symbols/111102.dwg")
Under ID, enter the unique identifier, as it can be found in the source file (e.g. PDT). (Here "111102".)
-> The DXF/DWG file is now inserted under Additional export formats.
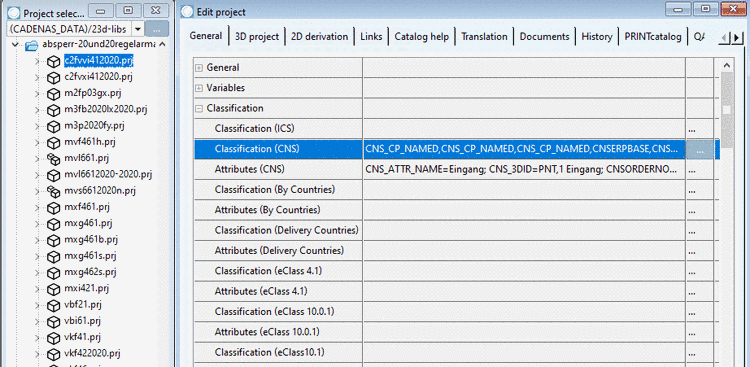
Open the Classification (CNS) by clicking on the search button .
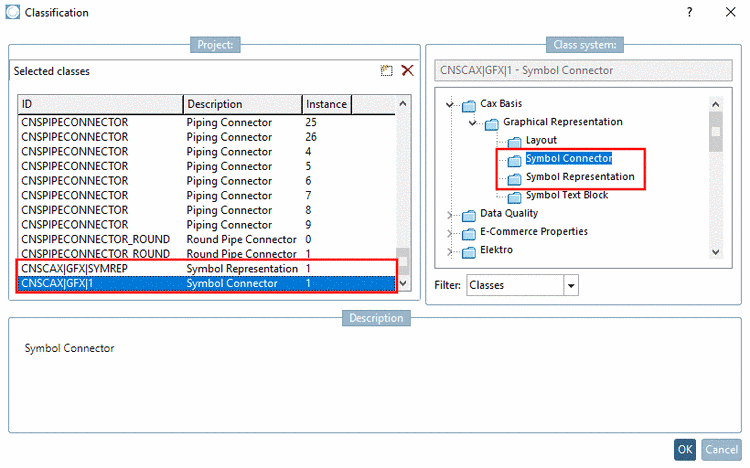
Set the classes CNSCAX|GFX|SYMREP (Symbol representation) and CNSCAX|GFX|1 (Symbol connector) and for each, enter the instance number.
Close the dialog and click on .
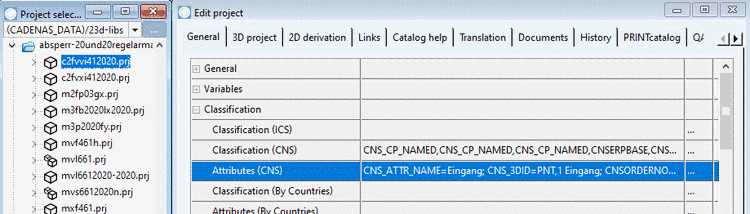
Open Attributes (CNS) by clicking on the search button .
In the attribute CNS_DOC_CNSURI, enter the ID of the additional file with following syntax.
ADDFILE://ID
Again use exactly respective ID from the source file (e.g. PDT). (Here "111102".)
Under CNS_DOC_NAME, enter the file name of the DXF/DWG file.
Create the connection between Symbol connector (CNSCAX|GFX|1) and Symbol representation (CNSCAX|GFX|SYMREP), namely by the value of the attribute Parent CLS_ID INST_ID. The last value of the string is the respective instance of CNSCAX|GFX|SYMREP.
Class "CNSCAX|GFX|1" with attribute "Parent CLS_ID INST_ID" and value "CNSCAX|GFX|SYMREP||<Instance>"
Fill out the required attributes of CNSCAX|GFX|1 and CNSCAX|GFX|SYMREP (if needed).
If all entries are made, the part can be exported to the CAD.