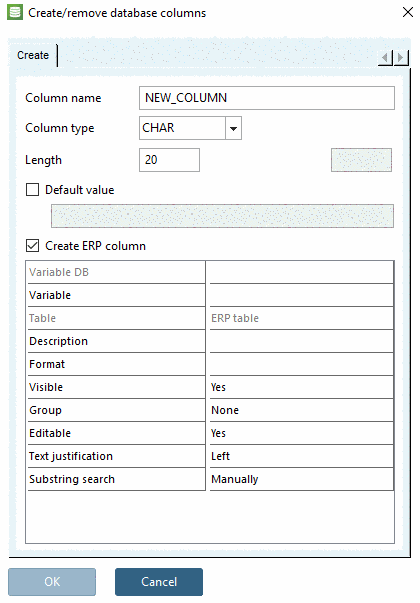
In order to import data from a CSV file, the columns in the ERP table must be available analogously.
The following description shows you how you can add any number of additional columns to the standard configuration.
You can reach the dialog Change database column in the PARTlinkManager via Extras -> Database -> Modify/create database columns.
![[Note]](https://webapi.partcommunity.com/service/help/latest/pages/jp/installation/doc/images/note.png) | Note |
|---|---|
The process "Add columns" directly accesses the database. In other words, you must be logged on with admin rights! Standard administration login is: user 'sa', password 'PARTsol9.0!'. | |
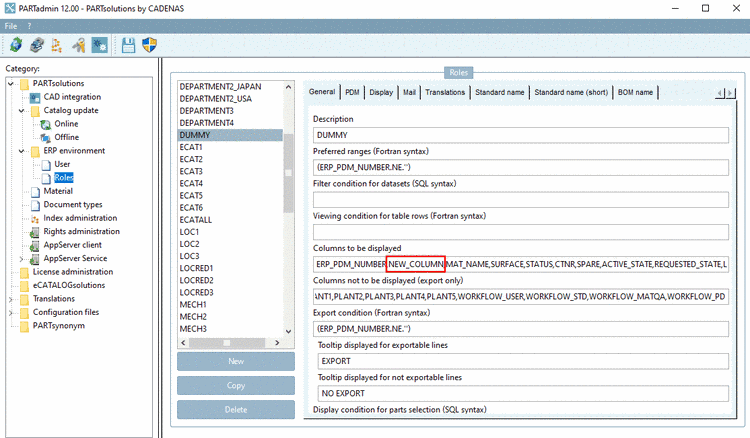
In order for the column in PARTdataManager to be shown, three requirements must be met.
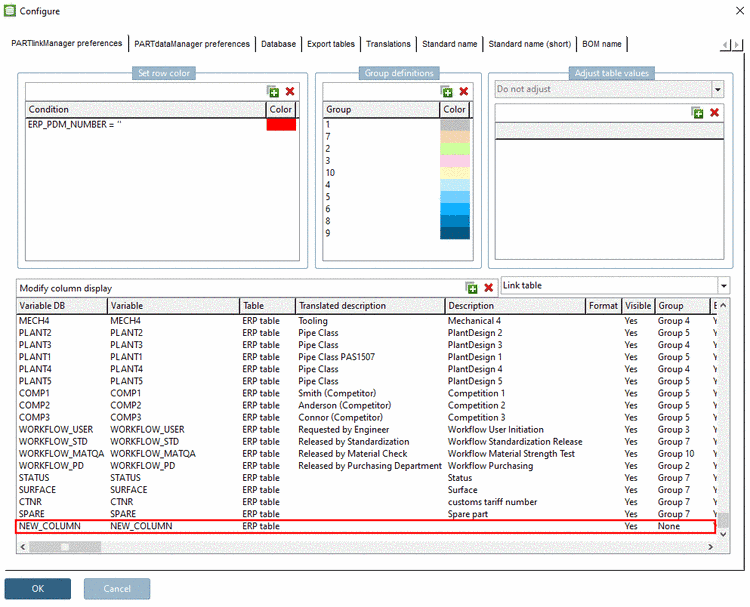
Under Modify column display the corresponding column under Visible must be set to Yes. (Visibility in the PARTlinkManager for control purposes)
In the columns Variable DB and Variable the assigned column name is displayed.
The entry under Variable DB is fixed.
The entry under Variable can be adjusted accordingly.
![[Note]](https://webapi.partcommunity.com/service/help/latest/pages/jp/installation/doc/images/note.png)
Note You must make sure, that the name under Variable is used for all configurations. (See the next two points)
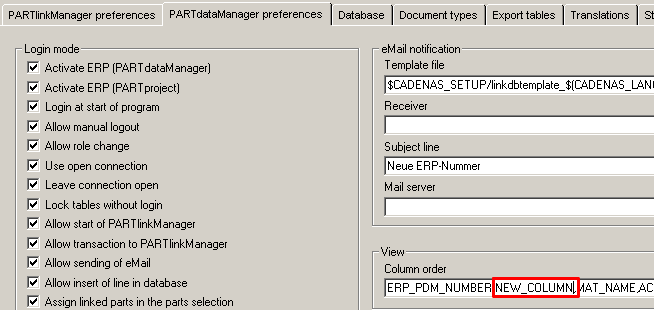
In PARTlinkManager -> Extras -> Configure ERP environment -> PARTdataManager preferences tabbed page the column under View > Column order must be filled out.
Restart the PARTdataManager. The added column is now shown.


![[Tip]](https://webapi.partcommunity.com/service/help/latest/pages/jp/installation/doc/images/tip.png)


