 |
- 3.1.19.6.1.2.1. Open
- 3.1.19.6.1.2.2. Versions
- 3.1.19.6.1.2.3. Go to class
- 3.1.19.6.1.2.4. Part information
- 3.1.19.6.1.2.5. Release Notes
- 3.1.19.6.1.2.6. Search in the catalog / Search in directory
- 3.1.19.6.1.2.7. Part comparison
- 3.1.19.6.1.2.8. Sort by geometric similarity
- 3.1.19.6.1.2.9. Geometrical search for this part
- 3.1.19.6.1.2.10. Partial search for this part
- 3.1.19.6.1.2.11. Sketch search for this part
- 3.1.19.6.1.2.12. Cloud Navigation Search
- 3.1.19.6.1.2.13. Purchineering
- 3.1.19.6.1.2.14. Duplicates Report
- 3.1.19.6.1.2.15. Unmachined / Finished part report
- 3.1.19.6.1.2.16. Price search...
- 3.1.19.6.1.2.17. Add to favorites
- 3.1.19.6.1.2.18. Copy
- 3.1.19.6.1.2.19. Copy projects to the clipboard
- 3.1.19.6.1.2.20. Hide project / Hide directory
- 3.1.19.6.1.2.21. Rename directory
- 3.1.19.6.1.2.22. Create new directory
- 3.1.19.6.1.2.23. Create document project
- 3.1.19.6.1.2.24. Analysis
- 3.1.19.6.1.2.25. Generate image data/preview images with batch run
- 3.1.19.6.1.2.26. Edit with PARTproject
- 3.1.19.6.1.2.27. Catalog Feedback
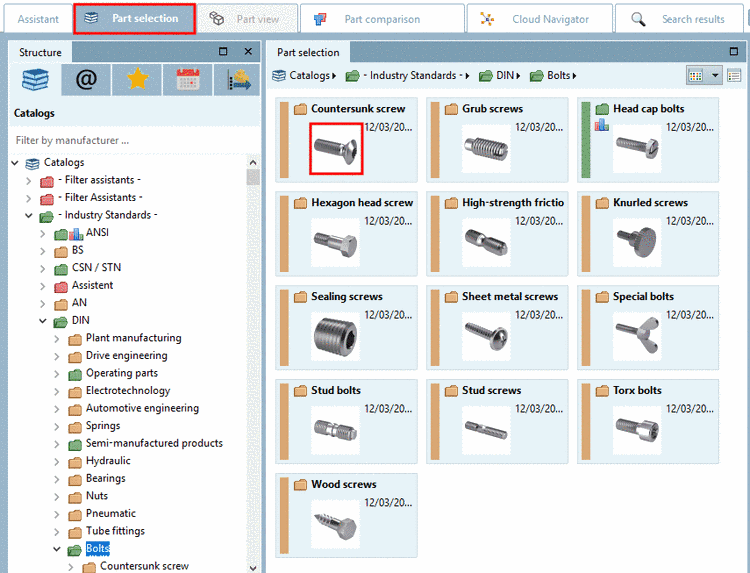
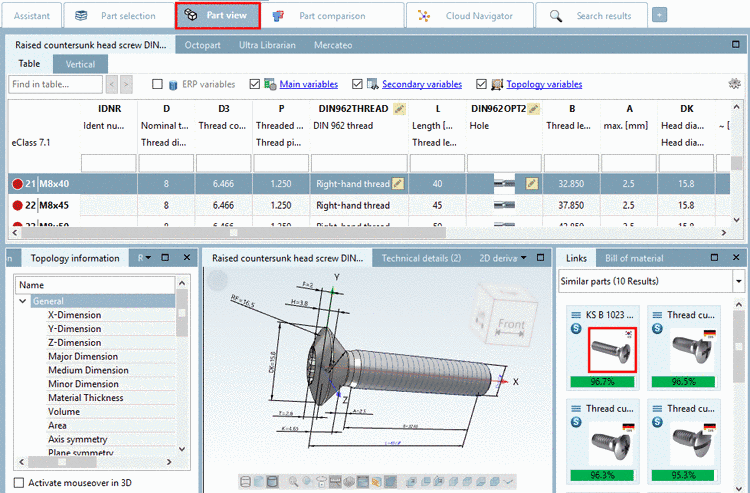
When clicking on Open the next deeper directory level is opened. With object (single parts / assemblies) the view is switched to the part view and the object is loaded.
If you kept the old versions during the catalog installation, you can open the these in the submenu of Versions or add them to the Part comparison.
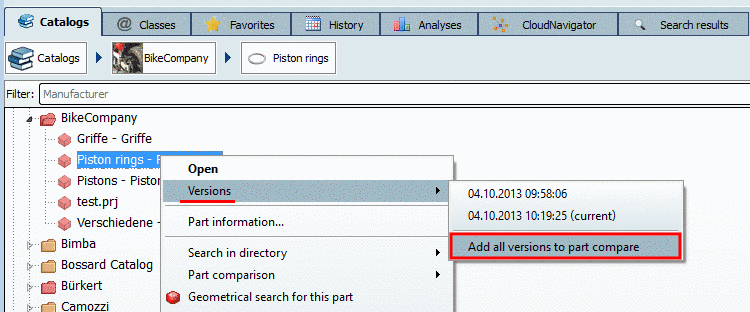
Add all versions to part compare:
-> The project versions are loaded in the Part comparison dialog.
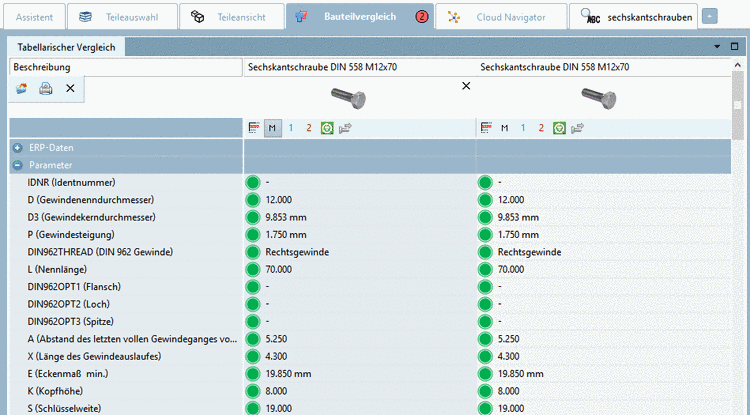
Information on the Part comparison can be found under Section 3.1.6.10, “ Part comparison ”.
For classified parts you can find the command Go to class in the context menu and the corresponding classes in the submenu (one or more).
When
clicking on a Classification,
the respective part is opened on the tabbed page  Classifications.
Here you can compare all parts classified in the same way.
Classifications.
Here you can compare all parts classified in the same way.
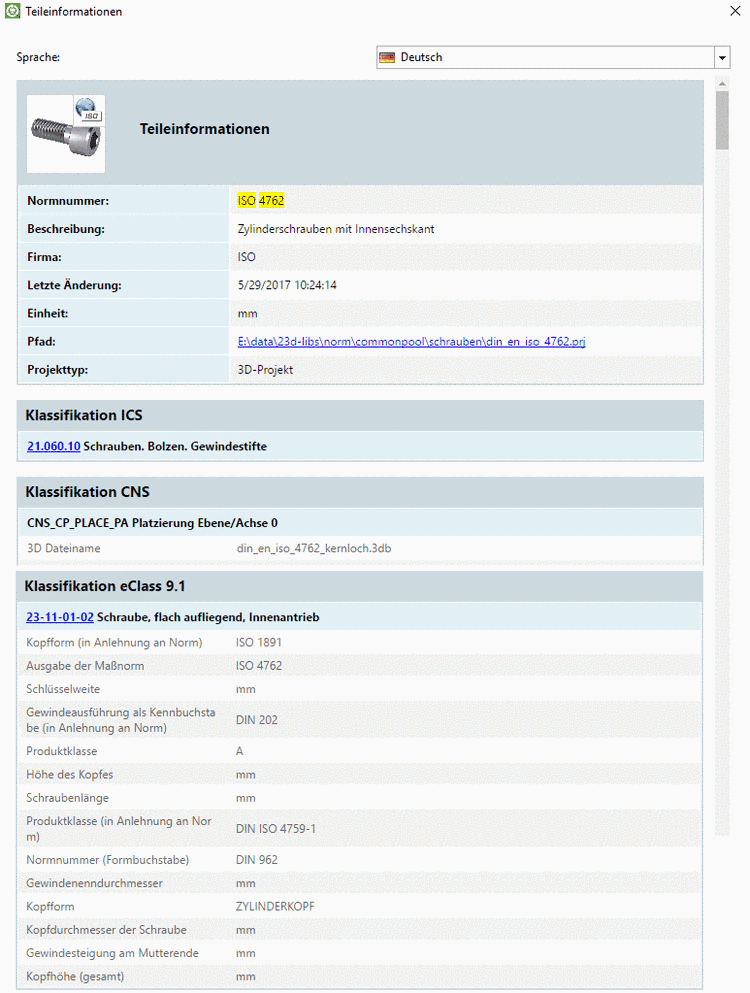
Project details (made at creation or changes) (part or assembly) (storage location, name, author, etc.) can be displayed in the Part information dialog box:
If the project is classified, the respective Classifications are displayed here.
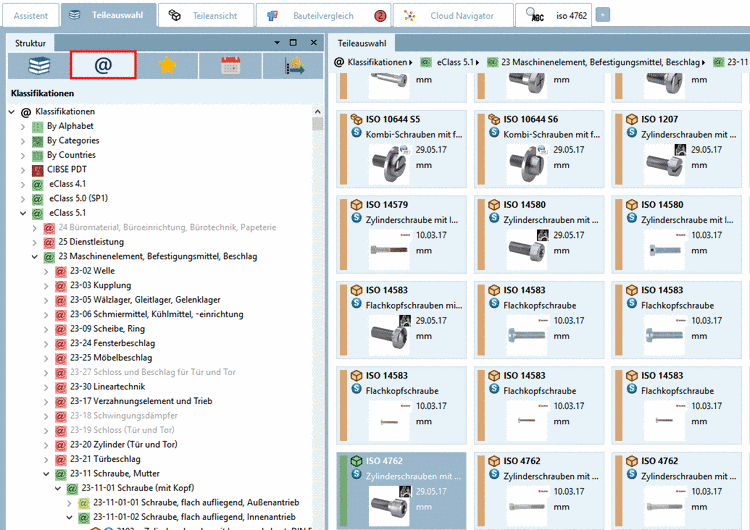
When clicking on a link, the part is opened in the Part selection under classifications.

Result after click on the link "23-11-01-02" (Schraube, flach aufliegend, Innenantrieb) in the window "Part information"

This menu item contains (maximum) the following subitems:
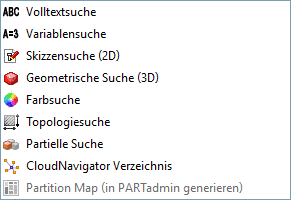
At the following context menu commands, at first the respective dialog box is opened. Then the search may be conducted. The directory to be searched is already set as filter (see under Search in).

Full-text search (see Section 3.1.6.4.3, “ Full-text search ”)
Variables search (see Section 3.1.6.4.5, “ Variables search ”)
Sketch search (2D) (see Section 3.1.6.4.7, “ Sketch search (2D) ”)
Geometric search (3D) (see Section 3.1.6.4.6, “ Geometric search (3D) ”)
Color Search (see Section 3.1.6.4.8, “ Color Search ”)
Topology search (see Section 3.1.6.4.12, “ Topology search ”)
Partial search (detailed information on this can be found under Section 3.1.6.4.10, “ Partial search ”
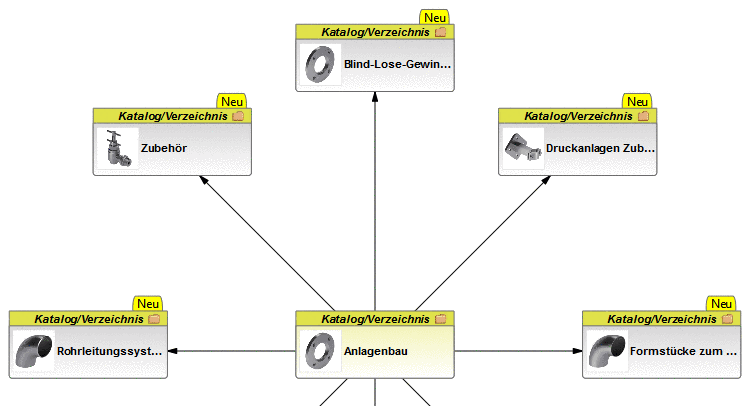
CloudNavigator Folder: In the Cloud Navigator, the directories of the next deeper level are displayed. Selected search criteria don't matter.
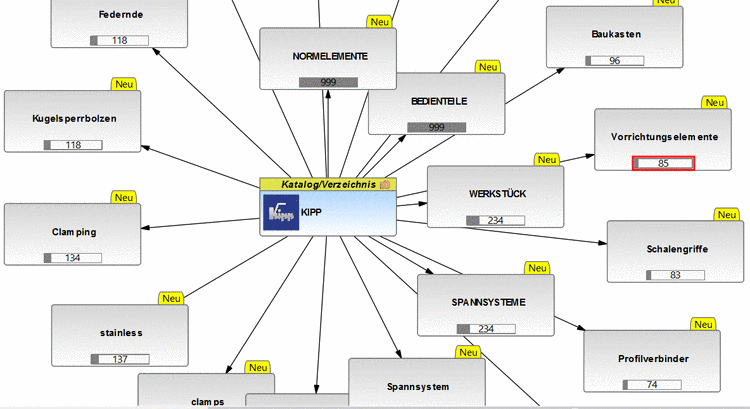
CloudNavigator TagCloud: This context menu command is only available in catalog level. The most frequent catalog terms are displayed.
The number shows how many times a term exists.
Partition Map: See Section 3.1.6.7.1.5, “"Partition Map" display mode ”.
An inactive (grayed out) command signalizes that the special index has not yet been created. See Kontextmenübefehle im Einzelnen -> Geometrical search index -> Create partition map.
Compare parts: Load as first part | Compare parts: Load as second part | Part compare: Add part
These commands are available at project level and within the search results. Herewith you can load parts into the Part comparison.

Detailed information on this can be found under Section 3.1.6.10, “ Part comparison ”.
The command is only available in the table.
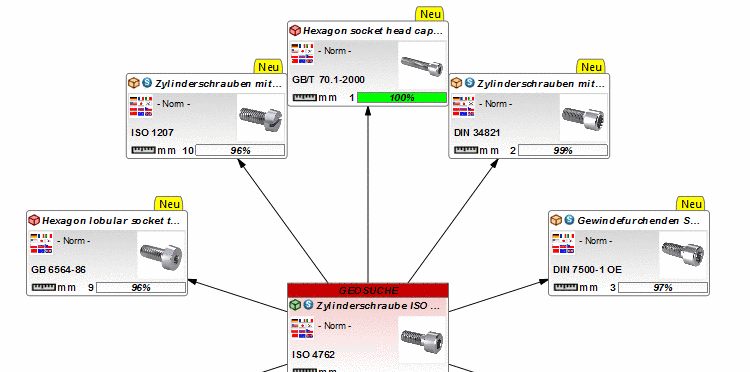
Especially in own part catalogs, where heterogeneous parts with quite different look are collected in a classification project, sorting of the table by geometrical similarity is helpful.
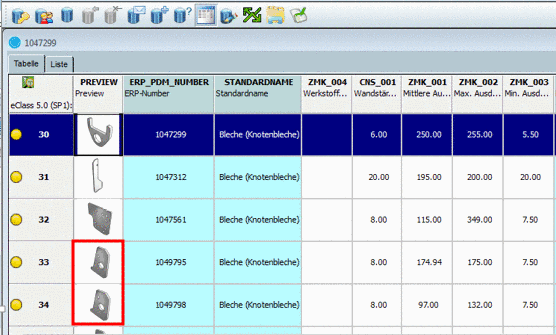
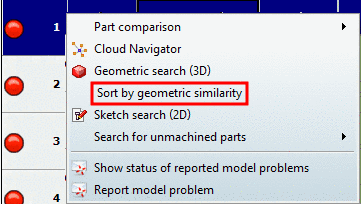
When clicking on the command, the Geometric search (3D) is automatically performed.
-> -The search part is displayed in the area of search methods.
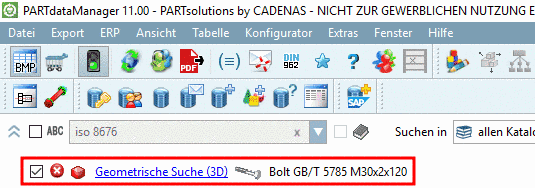
Detailed information on Geometric search (3D) can be found under Section 3.1.6.4.6, “ Geometric search (3D) ”.
The command is only available on project level. The selected part is displayed in the dialog box Partial search.
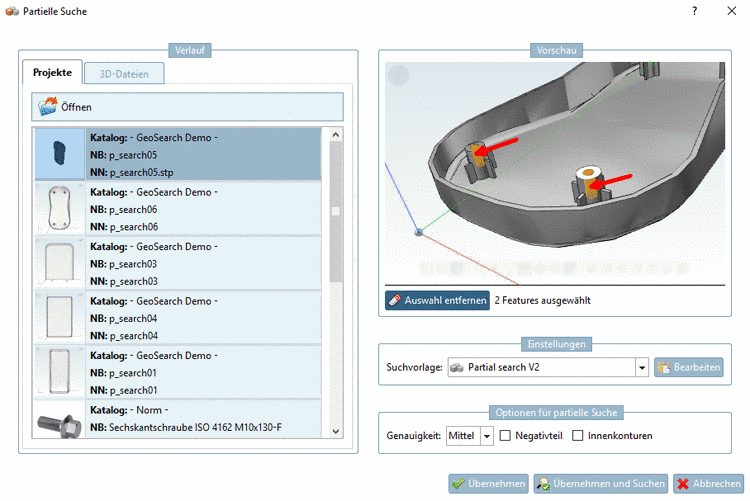
When clicking on , the search is immediately executed.
Detailed information on Partial search can be found under Section 3.1.6.4.7.4.2, “ Create sketches automatically from 3D and modify ”.
This command is only available at project level. The view sketches are automatically created. These can be modified in the dialog box Import drawing.
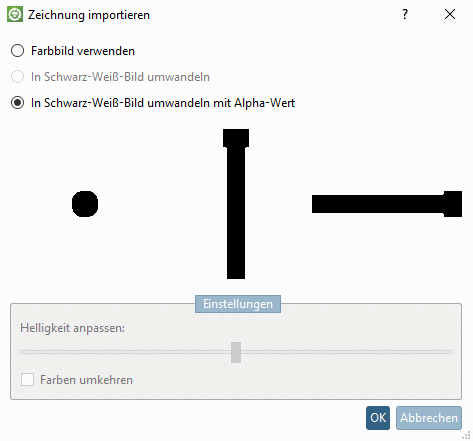
Start the search by clicking on .
-> The sketches of the search part are displayed in the area of search methods.

When clicking on the link Sketch search (2D), the sketcher is opened and you can modify single sketches, if wanted.
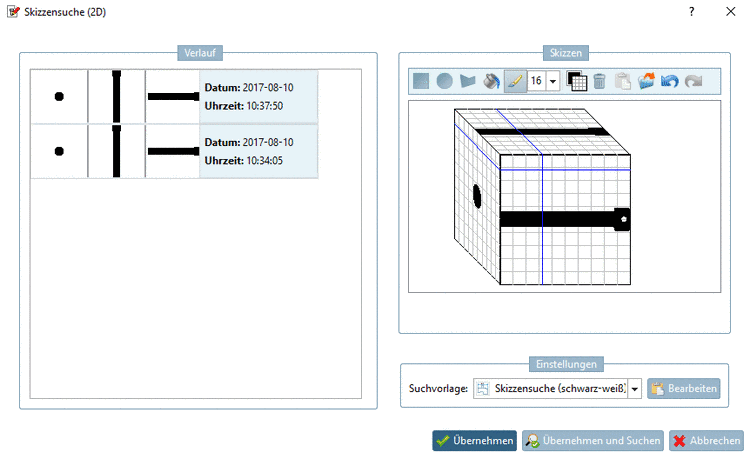
When clicking on the search is immediately executed.
Detailed information on Sketch search (2D) can be found under Section 3.1.6.4.7.4.2, “ Create sketches automatically from 3D and modify ”.
This command is only available at project level. The respective part is transferred to the Cloud Navigator as root node and then directly the search method Geometric search (3D) is performed.
Detailed information on CloudNavigator Search can be found under Section 3.1.6.11, “ Cloud Navigator ”.
The menu item Purchineering has the following subitems:
Comparison: Own part <-> Supplier part
At which parts is know-how available, which parts can be purchased?
The function Make or Buy enables you to search any other directories (supplier catalogs) for identic or similar parts, based on a selected directory (with any amount of own parts e.g., possibly the parts of a complex assembly)
The Make or Buy report function supports you at making the best decision regarding whether to produce parts or better buy them.
Comparison: Supplier part <-> Supplier part
In the course of supplier consolidation or standardization the supplier parts comparison may be interesting.
The similarity comparison is primarily performed on geometric base. An interesting feature is an additional textual search for reference statements concerning standard parts.
Comparison: Supplier part <-> Supplier part
If for the supplier comparison explicitly the cost side shall be focused on, select the Cost Mockup report.
The Cost mockup function delivers additional prices of search and compared parts in the report, so that you can make a costing on this base. Hereto a respective price column in the LinkDB is needed.
Keyword Global Sourcing: Do not ship parts around the world! When you want to check who is the best supplier, then its branches are determining.
The "Find supplier branches" report delivers the supplier sites sorted in a matrix of defined countries and supplier catalogs.
The calling project or directory is inserted in the respective dialog as search source.
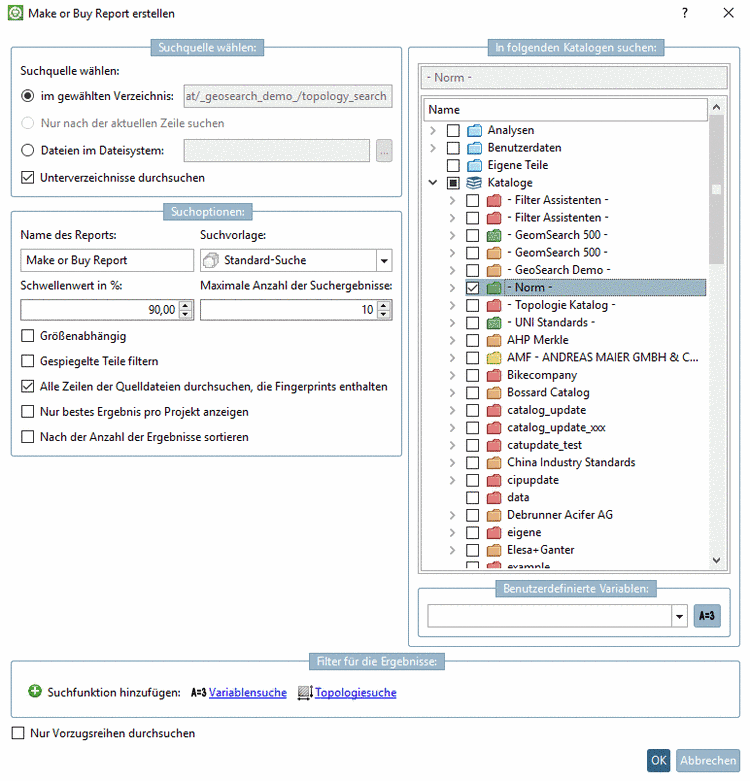
Detailed information is found under Section 3.1.13.1, “ Purchineering ”.
With the Duplicates Report you can search a directory (with subdirectories) for duplicates and create a detailed report.
The calling project or directory is automatically inserted in the respective dialog as source.
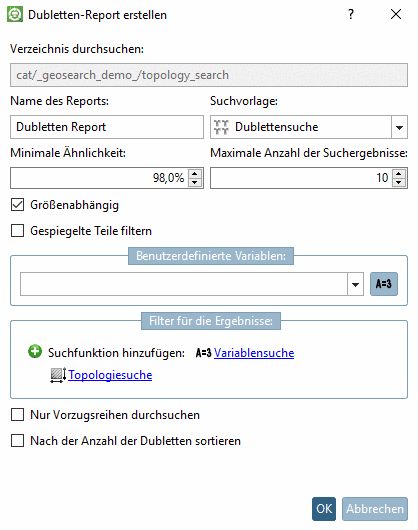
Detailed information on this can be found under Section 3.1.13.2, “ Duplicates Report ”.
The Unmachined / Finished part report detects adequate unmachined parts for the production of finished parts or vice versa finished parts, which can be produced from a certain unmachined part.
The calling project or directory is inserted in the respective dialog as search source.
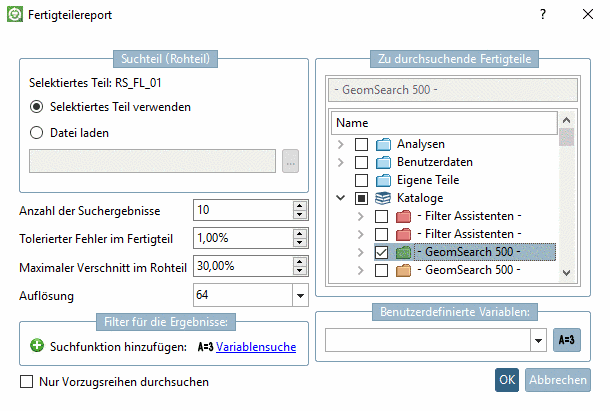
Detailed information is found under Section 3.1.13.3, “ Unmachined / Finished part report ”.
Conduct an Internet search with price comparison.[131]
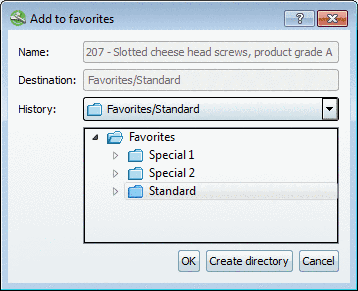
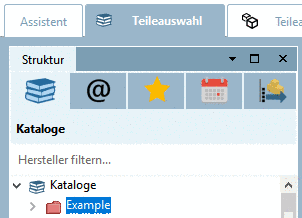
You can save frequently needed directories or projects on the tabbed page Favorites via context menu command Add to favorites.
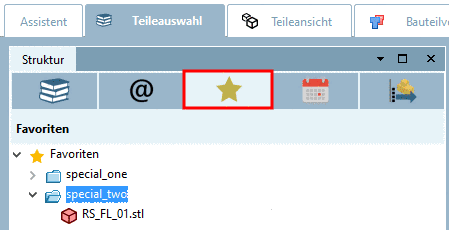
You can find the context menu command Add to favorites on the tabbed pages Catalogs, Symbols, Details, Classes, History, Analyses and at search results.

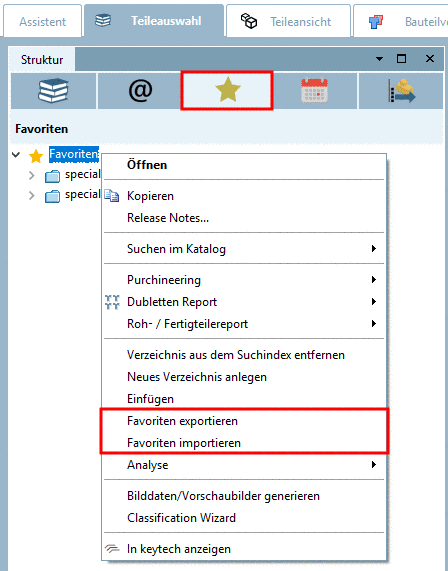
Export favorites / Import favorites
In the Favorites tabbed page you can find the commands Export favorites and Import favorites.
Thus you can simply transfer your personal favorites onto another computer.
|
Copy: ...copies the marked object.
|
|
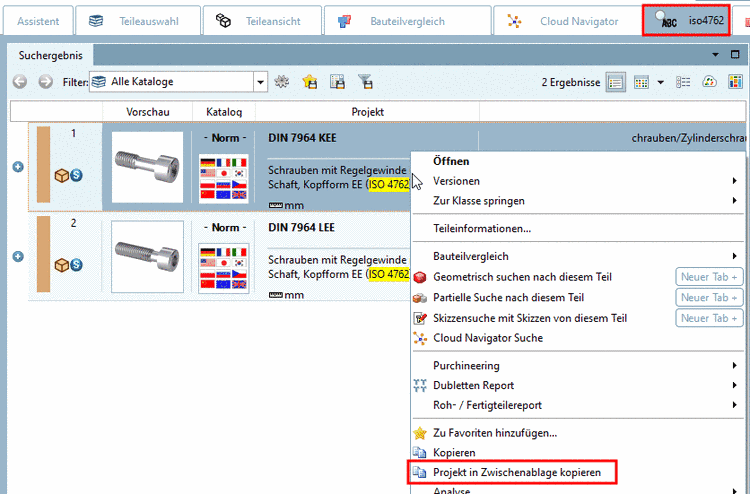
Copy projects to the clipboard (at search results): For example the description in the Project column
...deletes the selected project/directory from the directory tree.
![[Note]](https://webapi.partcommunity.com/service/help/latest/pages/jp/installation/doc/images/note.png) | Note |
|---|---|
Via PARTadmin (see Section 1.3.8.4, “Meaning of icons and display in the index tree ” in PARTsolutions - Administration Manual) you can include the directory/project again in the structure. | |
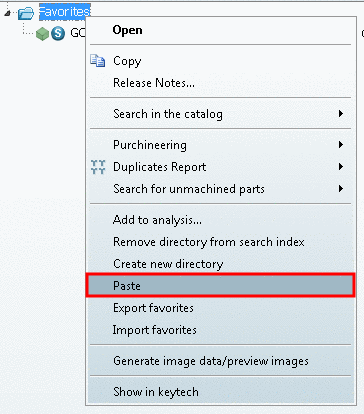
|
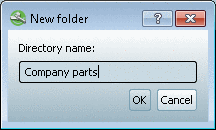
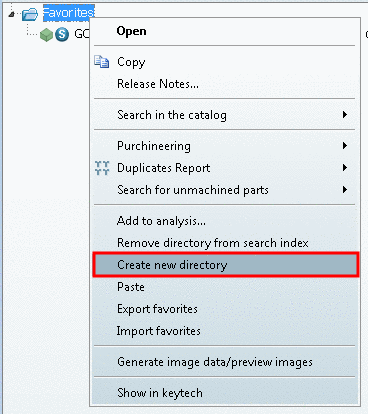
In order to set up a folder or a whole directory structure below the marked directory, select Create new directory from the context menu. -> The New directory dialog box opens.
|
|
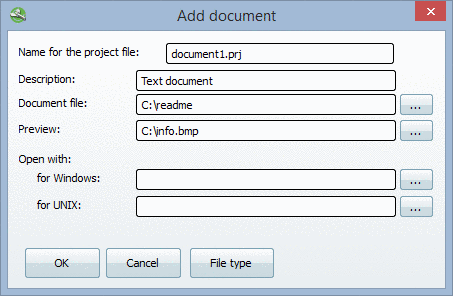
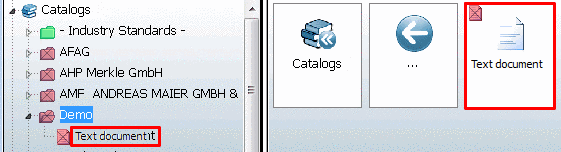
Document projects can be used to append supplementing information (e.g. dimensioning sheets) to a project. Common file formats for this purpose are *.html, *.pdf and *.doc.
Via context menu command Analysis -> Create analysis... you can perform following functions:
Comparison: Own part <-> Supplier part
At which parts is know-how available, which parts can be purchased?
The function Make or Buy enables you to search any other directories (supplier catalogs) for identic or similar parts, based on a selected directory (with any amount of own parts e.g., possibly the parts of a complex assembly)
The Make or Buy report function supports you at making the best decision regarding whether to produce parts or better buy them.
Comparison: Supplier part <-> Supplier part
In the course of supplier consolidation or standardization the supplier parts comparison may be interesting.
The similarity comparison is primarily performed on geometrical base. An interesting feature could be an additional textual search for reference statements concerning standard parts.
Comparison: Supplier part <-> Supplier part
If for the supplier comparison explicitly the cost side shall be focused on, select the Cost Mockup report.
The Cost mockup function delivers additional prices of search and compared parts in the report, so that you can make a costing on this base. Hereto a respective price column in the LinkDB is needed.
Information on this can be found under Section 3.1.14.1, “ Make or Buy, Cost mockup and Suppliers Analysis ”.
With the Duplicate Analysis, you can search a directory (with subdirectories) for duplicates.
Information on this can be found under Section 3.1.14.2, “ Duplicate Analysis ”.
In the dialog box Manage analyses you can find a list of all already created analyses and so open single desired analyses.
Information on this can be found under Section 3.1.14.3.7, “ Manage analyses - Call up created analyses later ”.
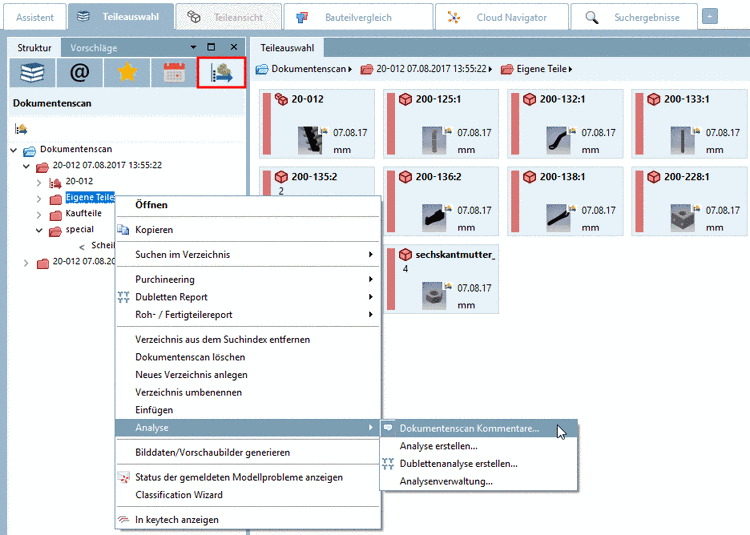
In each directory's and project's context menu, under Analysis, you can find the command Document scan comments.... So you can communicate cross-departmental.[132]
Information on this can be found under Section 3.1.12, “ Document scan / Analyses ”.
| Note |
|---|---|
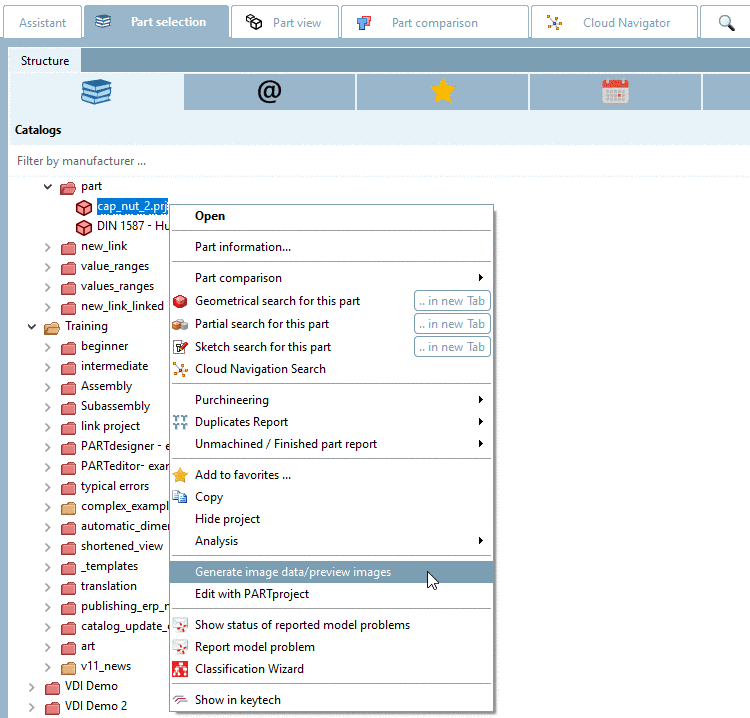
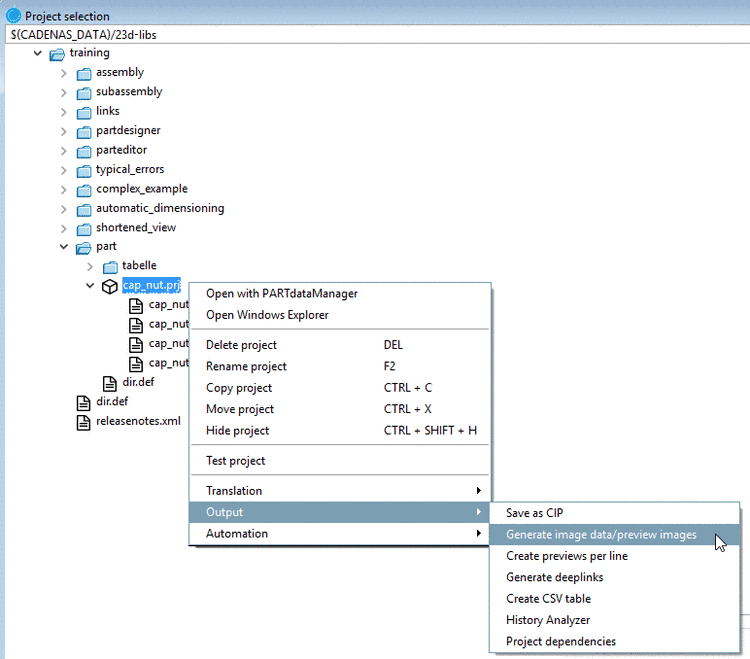
Via the Generate image data/preview images command two basic functions are available:
| |
The function is available on project and directory level both in PARTdataManager , and in PARTproject:
In order to create preview images in batch run, proceed as follows:
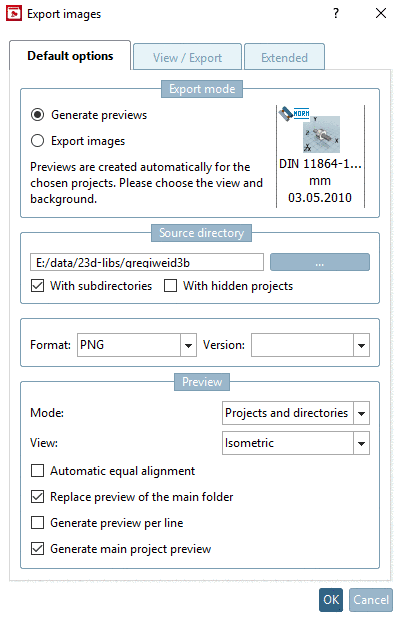
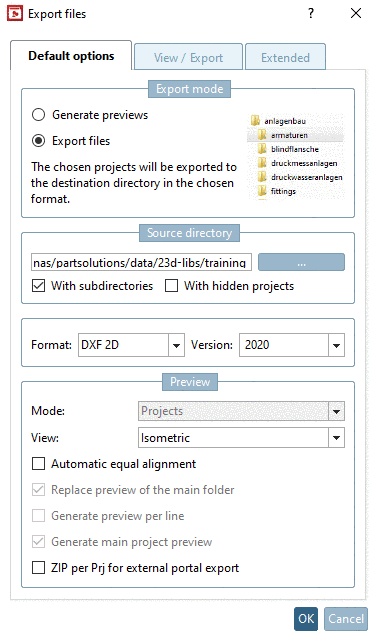
In the following the setting options are explained in detail:
Previews are displayed at different places.
In the following the complete procedure for preview image creation is explained.
The function is located at project and directory level in PARTdataManager [133], as well as in PARTproject:
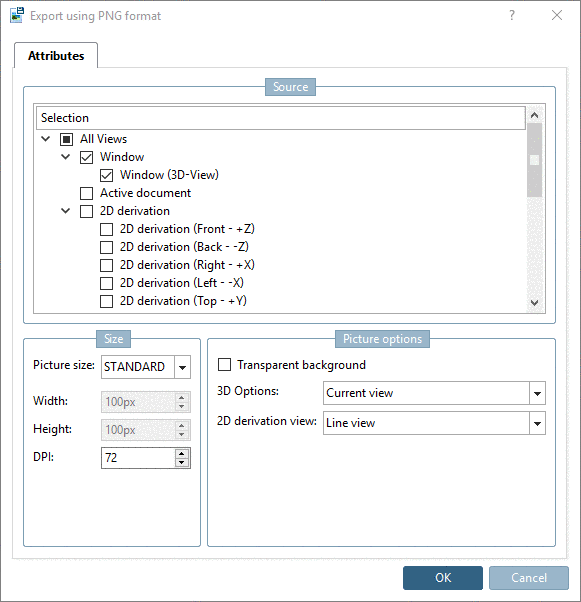
In the list field, select the desired format. You have three formats available for creating a preview image: PNG, Maxwell Render, POV-Ray.
If under Format the option PNG is selected, after confirming the selection by clicking , the dialog box Export using PNG format opens.
A detailed description of the settings can be found under Section 3.1.9.3.1, “BMP GIF JPEG PNG TIFF ”.
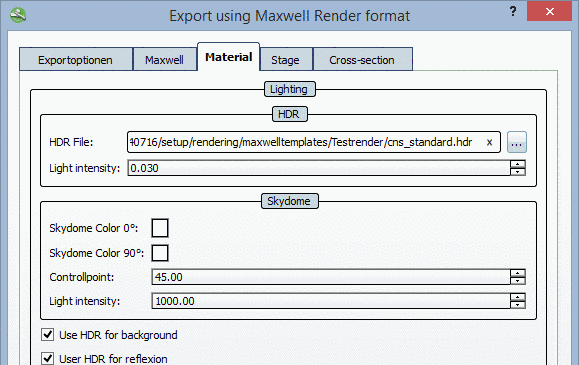
If under Format the selection Maxwell Render is made, after confirming the settings by clicking on , the dialog box Export Maxwell Render format opens.
A detailed description of the settings is found under Section 3.1.9.3.3, “Maxwell Render 3D ”. If under Render the selection Transfer to server is made, then the generation is running, supported by the module PARTrenderManager, which is also described in this section.
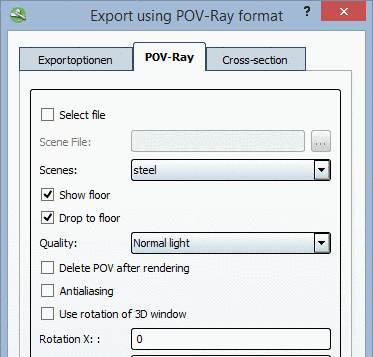
Create your preview images in high quality with POV-Ray Rendering.
If under Format the selection POV-Ray is made, after confirming the settings by clicking on , the dialog box Export in POV-Ray format opens.
A detailed description of the settings can be found under Section 3.1.9.3.4, “POV-Ray 3D ”.
From the list field, select whether the batch run is to access project or directory level or both.
View: In the list field select the desired perspective for the preview images.
Also see tabbed page View / Export -> Rotation.
All parts are oriented to the X axis with their longest side. If there are two "longest" sides, then one side is randomly selected.
Replace preview of the main folder
This option is only active if under Mode, either Projects and directories or Directories is selected.
If all settings are made, the please click the button.
![[Warning]](https://webapi.partcommunity.com/service/help/latest/pages/jp/installation/doc/images/warning.png)

Once all settings are made, please click .
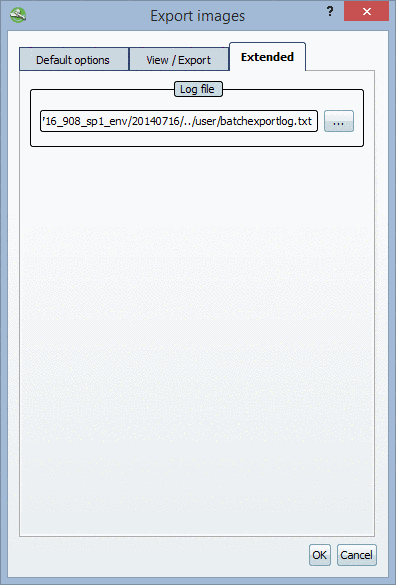
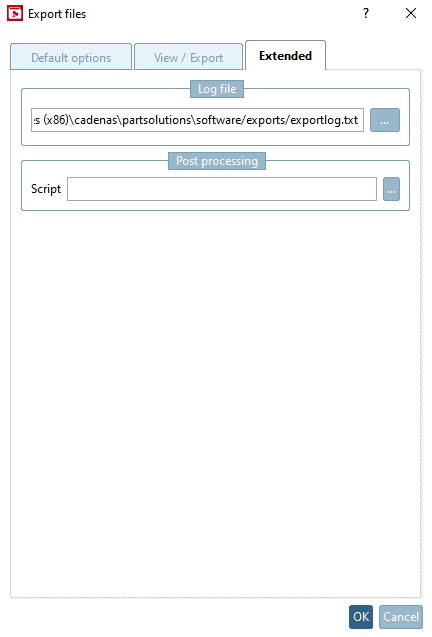
|
Storage location of log file for the export procedure. The inserted default path shows to your personal user directory. Via Browse button you can adjust the path. |
|
When all settings are made, please click .
The externally created preview images (*.png) are stored in PARTproject on directory or project level via .
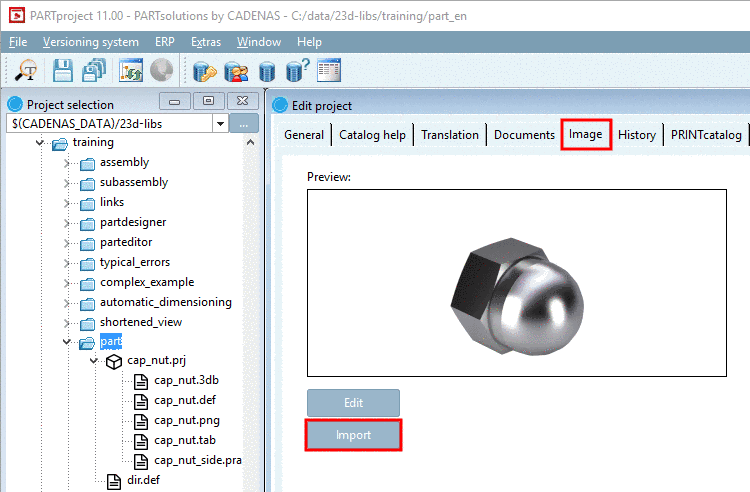
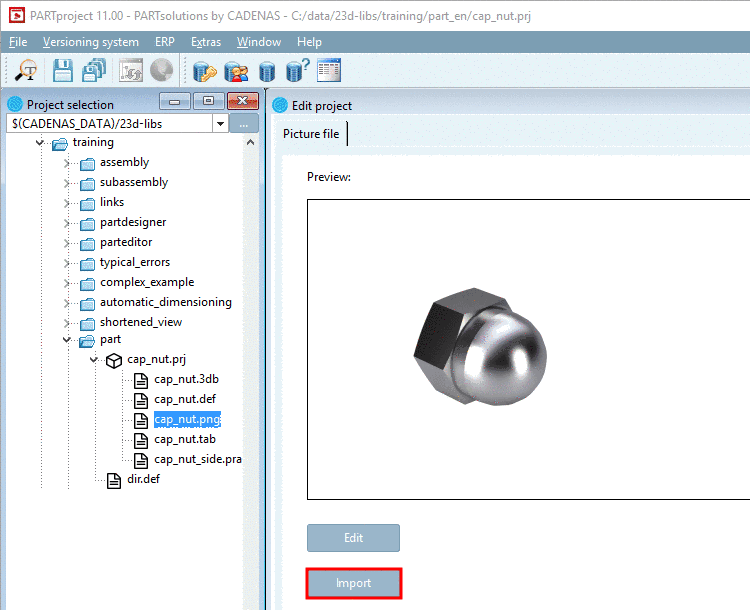
Detailed information is found under Section 5.9.13, “ Tabbed page Image ” in eCATALOGsolutions Manual.
With the help of the Export images option image data is exported in the specified target directory in a certain file format via batch run. The file formats Animated GIF, BMP, GIF, JPEG,Maxwell Render, PNG, POV-Ray, QR Code and TIFF are available.
Depending on the launched CAD all native and neutral formats in addition. (For this, a batch license is required.)
In the following the setting options are explained in detail:
Select the desired format in the list field. (At certain formats the format can be specified via Version).
The file formats Animated GIF, BMP, GIF, JPEG,Maxwell Render, PNG, POV-Ray, QR Code and TIFF are available. Depending on the launched CAD all native and neutral formats in addition. Compare formats available in PARTdataManager, under Export menu. Detailed information on export formats can be found under Section 3.1.9, “ Export into different file formats (without PARTsolutions interface) ”.
Select a background from the list field for the preview image.
Among others, you have the following available: 8.1, 9.0, Purist, blank, Metal, Wood and backgrounds close to the CAD system.
If the option Export mode, Export files is selected, then this setting is inactive.
View: In the list field select the desired perspective for the preview images.
Also see Rotation.
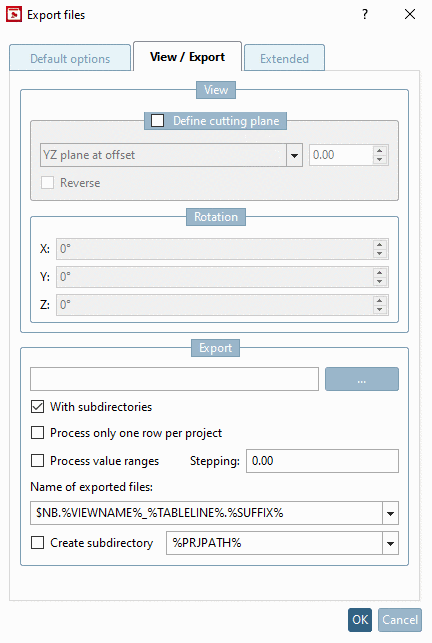
Determine a target directory for the export files via browse button .
You can include subdirectories for the generation of the export files optionally.
Process only one row per project:
Limit the read table lines to one characteristic per project file.
Project files with value ranges can be splitted by the declaration of a Stepping width. If this option is deactivated, only the currently set value (meaning one characteristic) is read.
Select the desired option for the naming convention in the list field.
The file name of the export file is composed according to the defined syntax. You can find some examples in the list field:
E.g. Standard name NB, followed by VIEWNAME (e.g. Front view) and the file extension SUFFIX. Of course you can adjust this composition according to your preferences.
When all settings are made, then click on .
| Note |
|---|---|
This command is only available in the developer mode. Detailed information on this is found under Section 1.7.4.3.3.1, “ Key "IsAdmin" - User mode ” in PARTsolutions - Administration Manual. | |
Edit with PARTproject: ...starts PARTproject.
Within PARTproject you can make any changes in the project.
Detailed information is found under Chapter 5, PARTproject in eCATALOGsolutions Manual.
The context menu contains the following commands concerning Catalog Feedback:
More detailed information can be found under Section 3.1.16, “ Catalog Feedback ”.
[131] Currently Google Shopping
[132] Comments are stored in a common, shared index to support cross-departmental working (Purchineering).
[133] Only in developer mode. You can find detailed information on how to set the mode under Section 1.7.4.3.3.1, “ Key "IsAdmin" - User mode ” in PARTsolutions - Administration Manual.