
The assignment takes place in two steps:
First the assignment of the classification. And then optionally the assignment of features.
In the context menu of a directory, execute the command Automation -> Add projects to classification (here in the example on "Cap screws").
-> The dialog window of the same name opens.
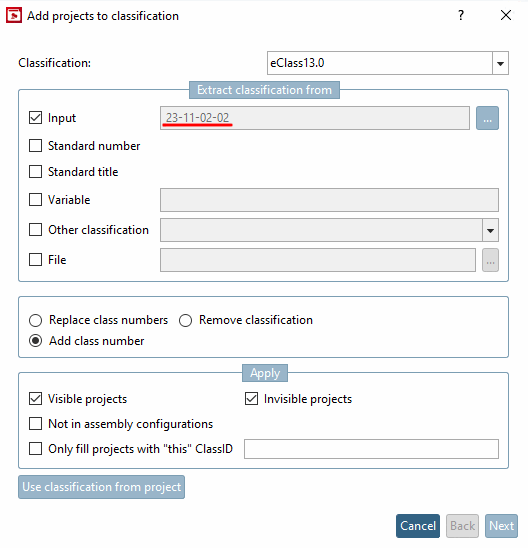
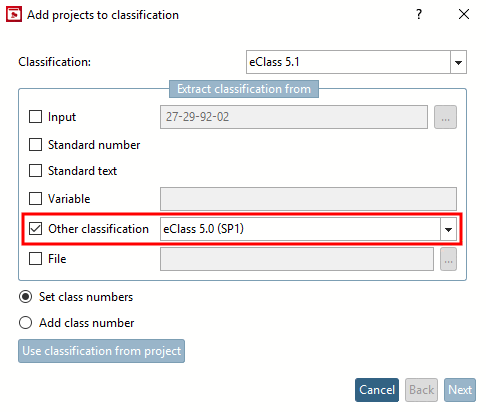
In the Extract classification number from dialog area, activate the Input option.
![[Note]](https://webapi.partcommunity.com/service/help/latest/pages/jp/ecatalogsolutions/doc/images/note.png)
Note For manual input, only the Input option is relevant. For the other options, see Section 5.12.7.2, “Automatic transfer ”.
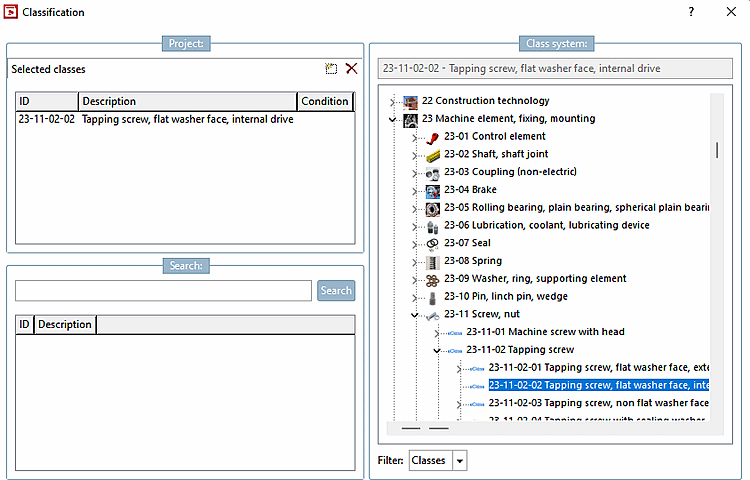
-> The Classification dialog box opens.
Select the desired class (or several in succession) and double-click to assign it so that it is then displayed under Selected classes.
-> You are now back in the Add projects to classification dialog.
Select one of the following options:
If you do not want to lose any old classification numbers, it is better to select Add classification numbers [Add class number].
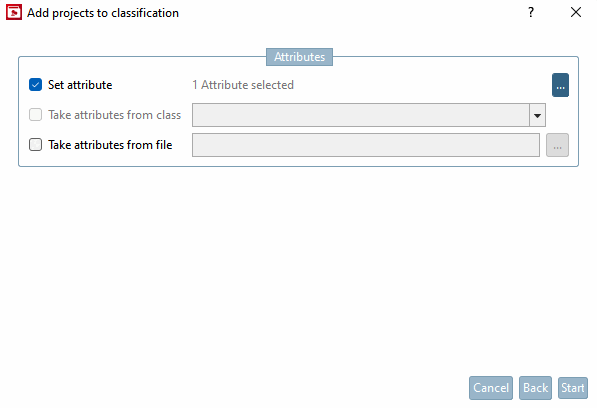
-> The view switches to the Set characteristics [Set attribute] dialog area with the options Set characteristics [Set attribute], Copy characteristics from class [Take attributes from class] and Copy characteristics from file [Take attributes from file], which are explained in more detail below.
"Add projects to classification [Add projects to classification]" dialog box -> "Characteristics [Attributes]" dialog area
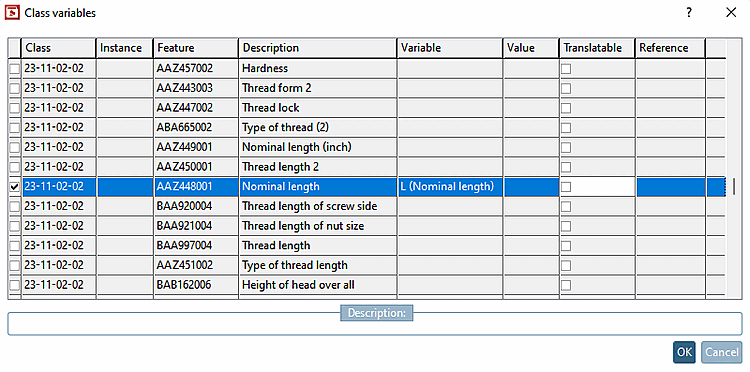
Clicking on the button opens the Class variables dialog box.
The checkboxes at the beginning of each line are only displayed if the dialog window was opened via the directory tree.
You can use the checkboxes to "work your way down" through the directory levels and only activate the desired features.
After completing the entries, confirm with OK.
When all entries in the Add projects to classification dialog box are complete, click .
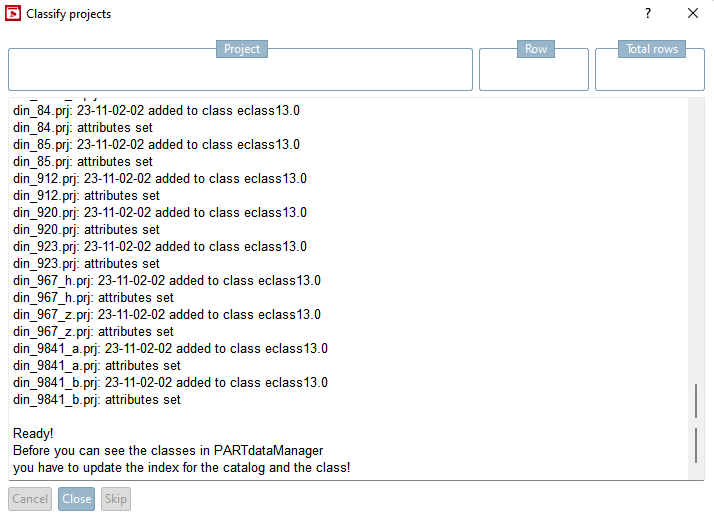
--> You will receive a list of the operations performed.
At the end of the process, you will receive a corresponding message with a message to update the display index.
Adopt features from class [Map variables from other class]:
Together with Other classification on the first dialog page, this option allows you to transfer existing information from other classes. It is only active if Other classification has also been activated.
Transfer characteristics from file [Get class variables from file]
If the classifications or characteristics are already available externally, you can also transfer the characteristics from a CSV file.
The CSV file must contain the following attributes: ClassId, NN (standard number), idmm (characteristic), either variable or value (fixed value).
Activate the option Copy features from file [Get class variables from file] and set the path to the file using Browse
!["Add projects to classification [Add projects to classification]" dialog box](https://webapi.partcommunity.com/service/help/latest/pages/jp/ecatalogsolutions/doc/resources/img/img_b8293fb92d4b413f96dc3ccdec72aff8.png)
!["Add projects to classification [Add projects to classification]" dialog box -> "Characteristics [Attributes]" dialog area](https://webapi.partcommunity.com/service/help/latest/pages/jp/ecatalogsolutions/doc/resources/img/img_7211544e36ea4b74ba69b6caa23ef0b6.png)
![Adopting features from class [Take attributes from class]](https://webapi.partcommunity.com/service/help/latest/pages/jp/ecatalogsolutions/doc/resources/img/img_1c250615657845eba0d519da97c0e1ac.png)
