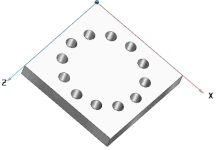
In rotated patterns the borings are circularly arranged around a central point.
The following example shows the design process of a rotated pattern step by step in detail.
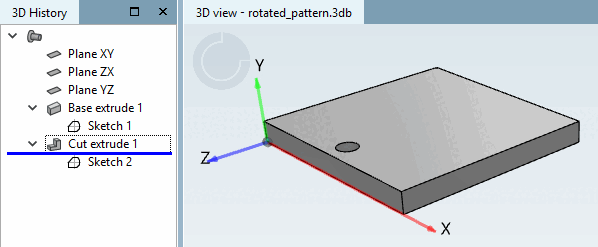
Initial situation: The original hole has already been created using Cut extrude (Sketch 2). This is to be duplicated in a circular shape so that a total of 12 holes are created.
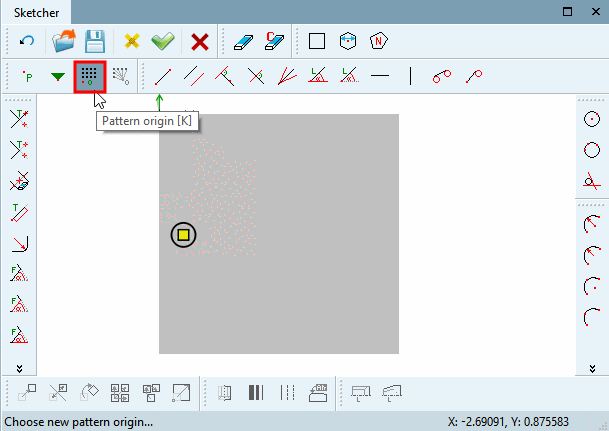
Open the sketch with the original hole and set the pattern origin to the hole using the Pattern origin button.
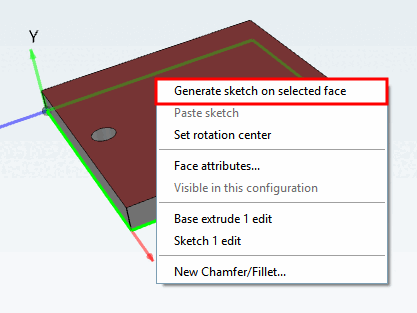
Use Create new sketch on selected area [Generate sketch on selected face] to create a new sketch for the pattern.
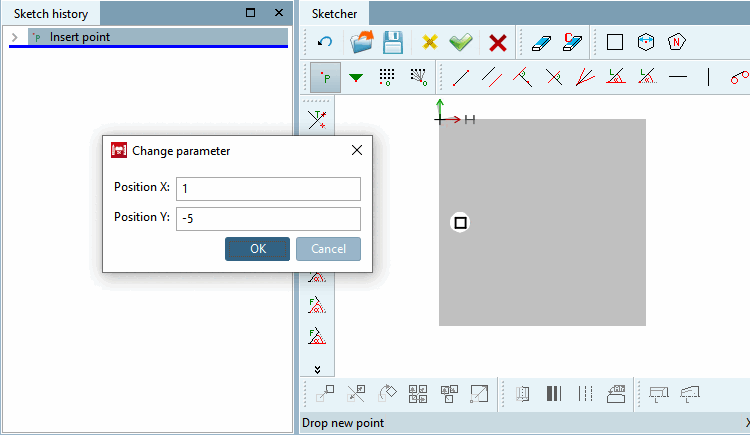
In this sketch, set the starting point for the pattern design exactly at the same place, where the pattern origin is in the other sketch.
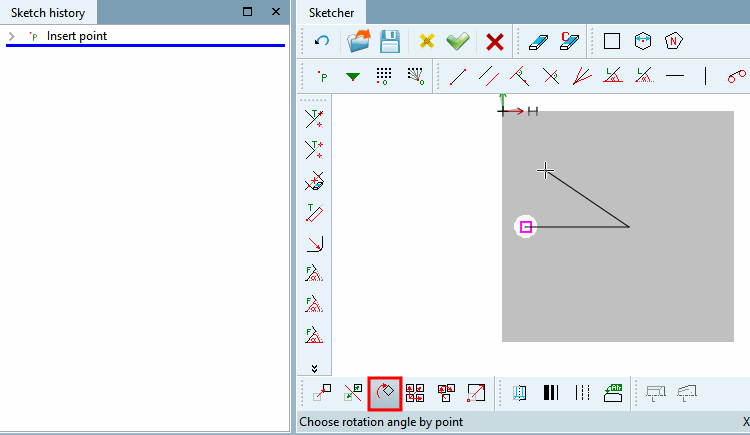
Hold down the Ctrl key and click the Rotate selection button
 .
.
Follow the notes in status line:
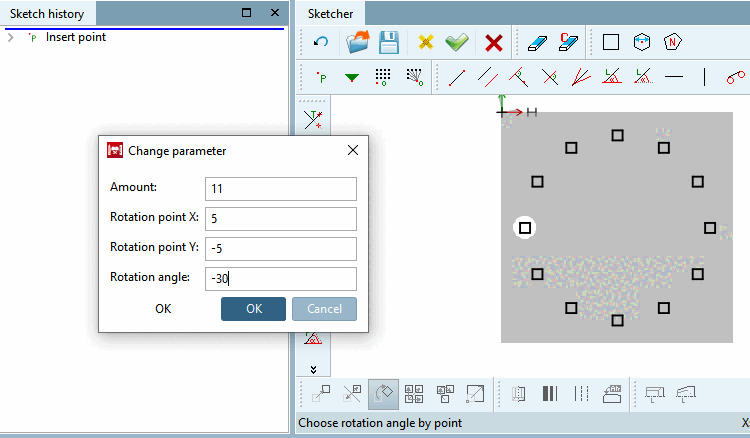
-> The Change parameters [Change parameter] dialog box opens.
Adjust the values in the input fields for Number [Amount], Pivot point [Rotation point] and Pivot angle [Rotation angle] and confirm with .
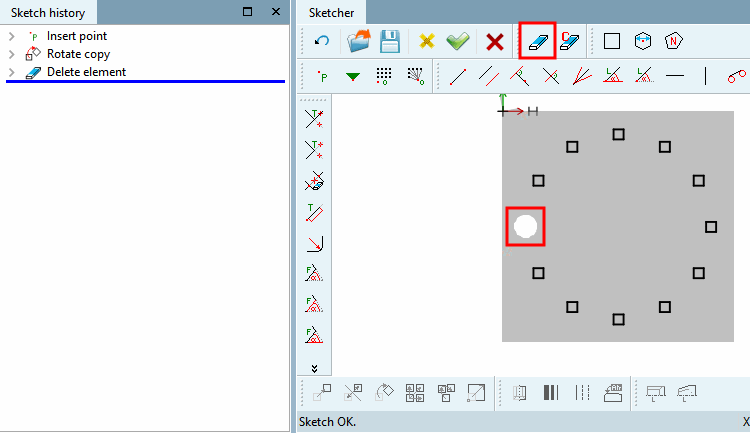
Delete the base point using Delete element
 as it would otherwise be created twice. The base point is located in the other sketch.
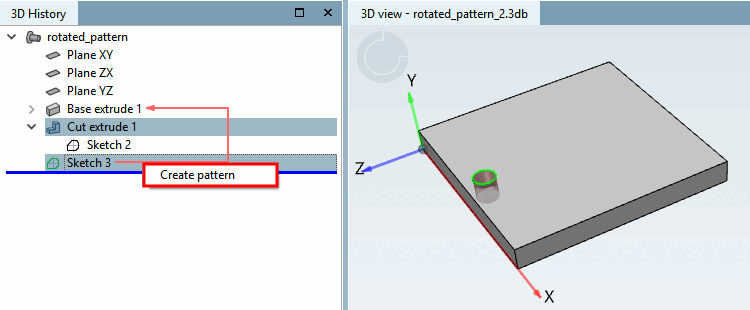
In the 3D history [3D History], select the Cut extrude construction steps and the sketch that contains the pattern (in the example, sketch 3 ) and click Create pattern in the context menu.
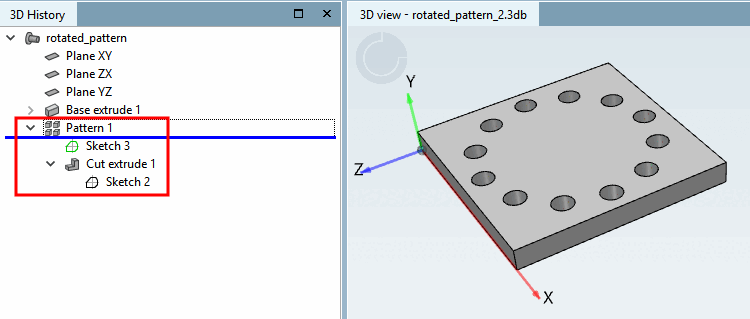
-> The borings are copied according to the pattern.
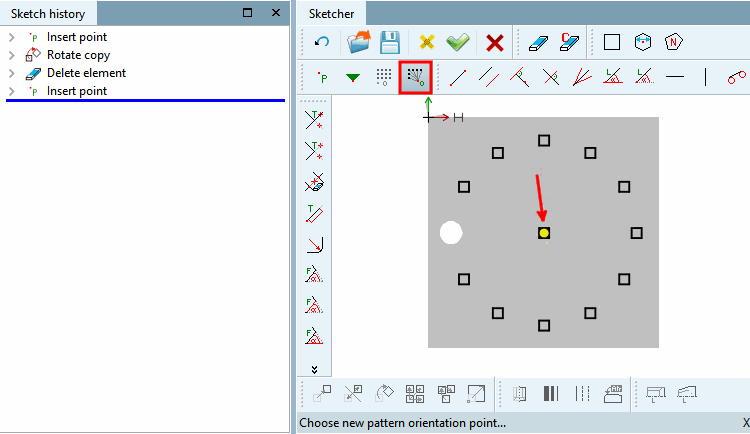
Align borings to reference point
![[Note]](https://webapi.partcommunity.com/service/help/latest/pages/jp/ecatalogsolutions/doc/images/note.png)