The pattern wizard makes it easy to create, edit and delete circular [Circular Pattern] and rectangular [Rectangular pattern] patterns. It is also compatible with older versions, as no new features are used.
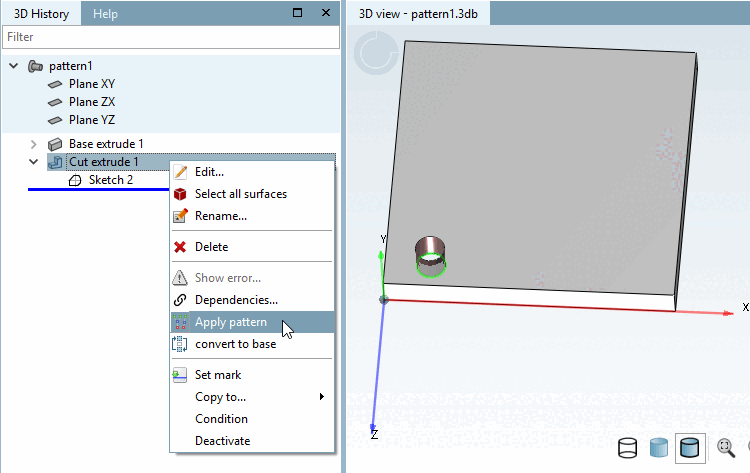
The call is made on Base extrude or Cut extrude via the context menu command Patterns [Apply pattern].
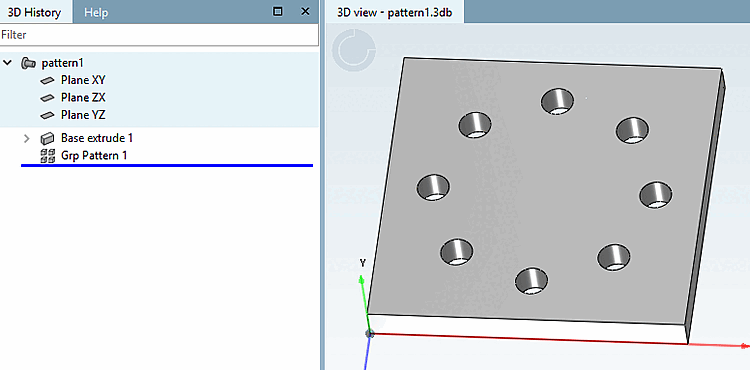
Select the base element of the pattern (here "Cut extrude 1") and click on the context menu command Pattern [Apply pattern].
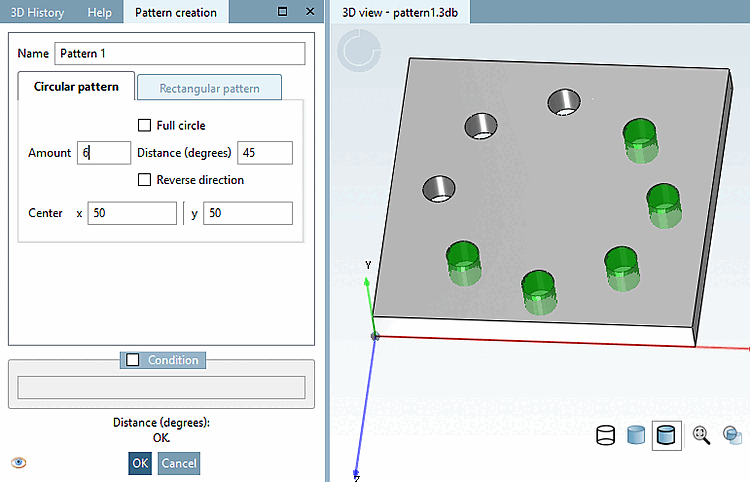
-> The pattern generation [Pattern creation] docking window opens.
Select the center [Center] to match the base element.
Determine the number [Amount] of pattern elements.
By default, a full circle is created.
You can also deactivate the Full circle option, define the spacing angle under Spacing (degrees) [Distance (degrees)] (for 8 elements in the full circle, this is 45°) and reduce the number of elements.
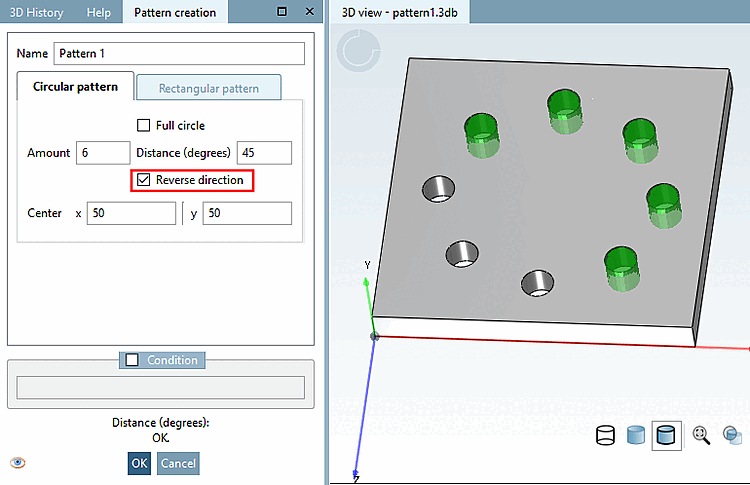
You can also reverse [Reverse direction] the direction [Reverse direction].
-> The circle pattern is displayed in the 3D history [3D History] under Grp Pattern.
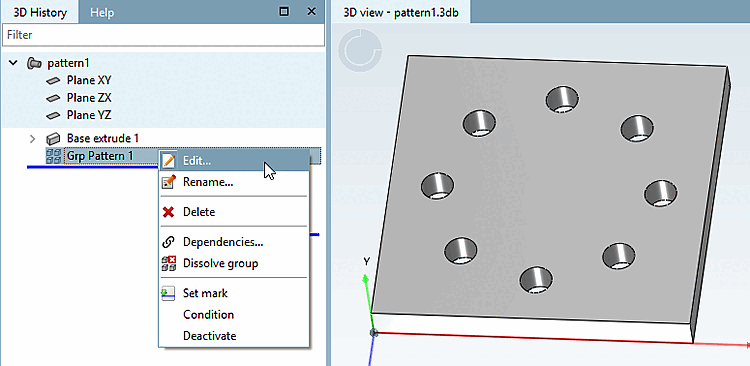
To edit an existing pattern again, select Grp Pattern and click on Edit.... [Edit...]
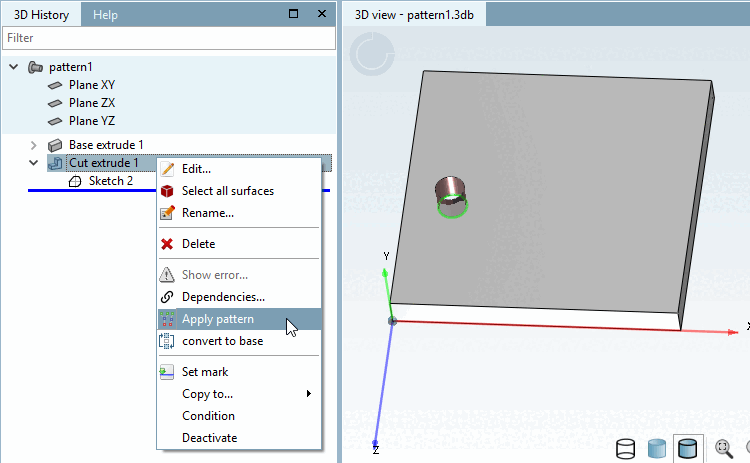

Select the base element of the pattern (here "Cut extrude 1") and click on the context menu command Pattern [Apply pattern].
-> The pattern generation [Pattern creation] docking window opens.
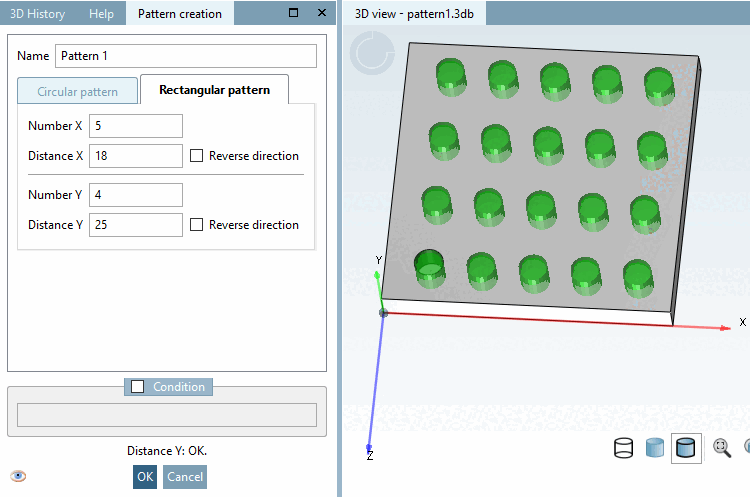
Select the Rectangle pattern [Rectangular pattern] tab page.
Under Number X, determine the number of pattern elements in the X direction.
Under Distance X, determine the distance between the pattern elements in the X direction.
Under Number Y, determine the number of pattern elements in the Y direction.
Under Distance Y, determine the distance between the pattern elements in the Y direction.
With Reverse direction, the individual elements are arranged in the opposite direction of the axis.
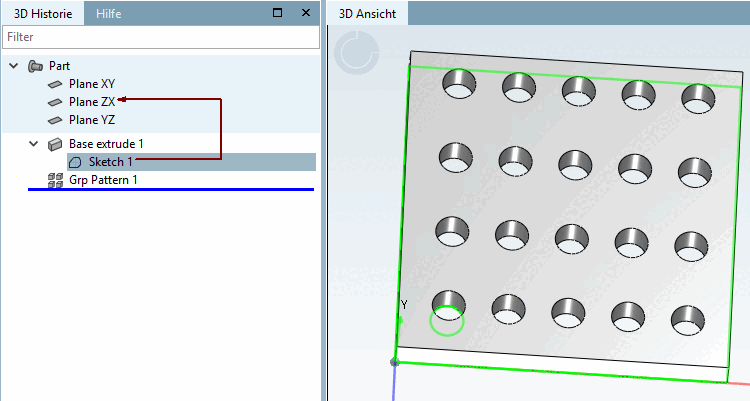
-> The rectangular pattern is displayed in the 3D history [3D History] under Grp Pattern.