You can create attributes of the document [Document] type. These appear in PARTdataManager as green document columns.
When clicking into the cell the linked document opens (e.g. Word, Excel, PDF, text file, etc.).

To create document columns, proceed as follows:
Click on the button
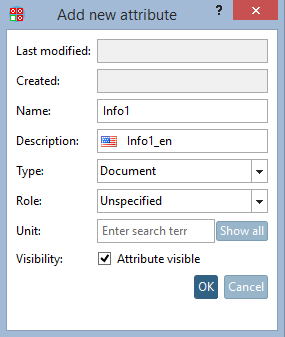
 Create attribute.
Fill in the Name and Description fields. Select the Document option in the Type list field and confirm with .
-> The attribute is added to the global attribute list.
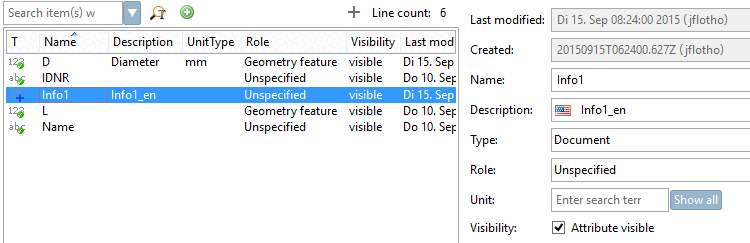
Click on the context menu command Edit product attributes.
-> The Edit product dialog box opens. You can see that the newly added attribute is not yet displayed (it is only in the global list).
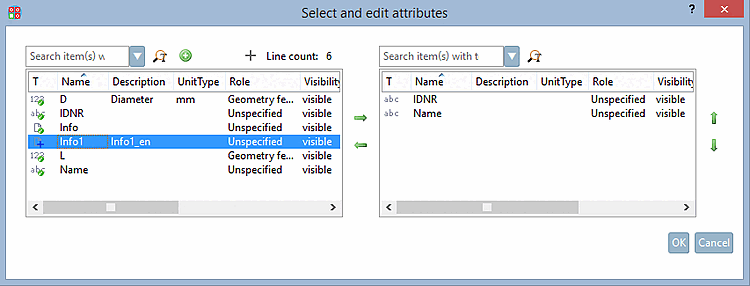
-> The Select and edit attributes dialog box opens.
You can see that the "Info" attribute has not yet been added to the product. (It is only visible on the left-hand side of the dialog window)
Select the desired attribute and transfer it to the right-hand side using the green arrow button and confirm with .
Click into the cell of the newly created attribute.
-> An Explorer window opens where you can select the desired file.
-> At the moment the current document path is displayed.
You can see the added attribute with the document path in the tile and table views. To see the newly created "Info" attribute in the list views as well, click on the Show attributes button.
-> The Select and edit attributes dialog box opens.
Here too, move the "Info" attribute to the right-hand side and confirm with .
-> Now the attribute column "Info" is also displayed in the list views.
After catalog export the attribute is displayed as a green document column in PARTdataManager.