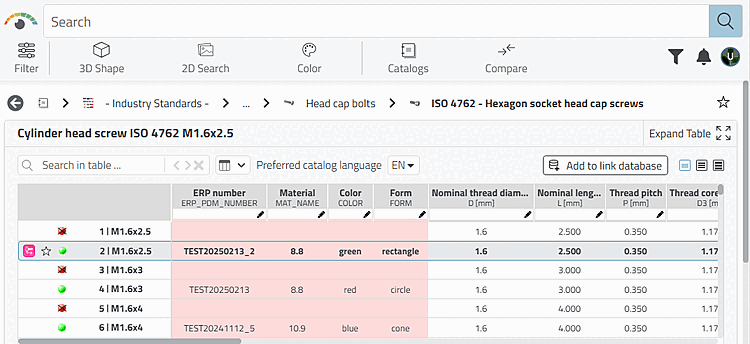
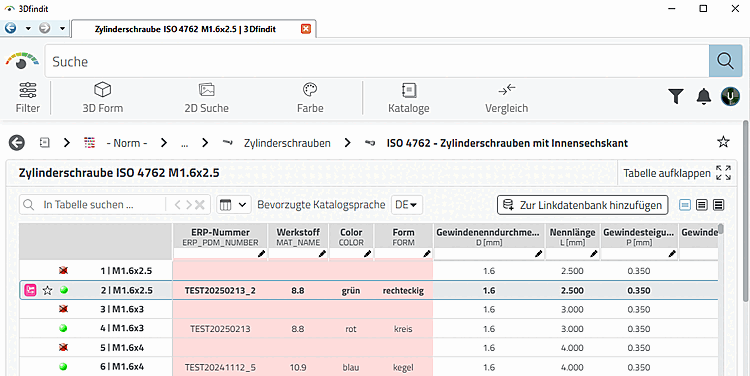
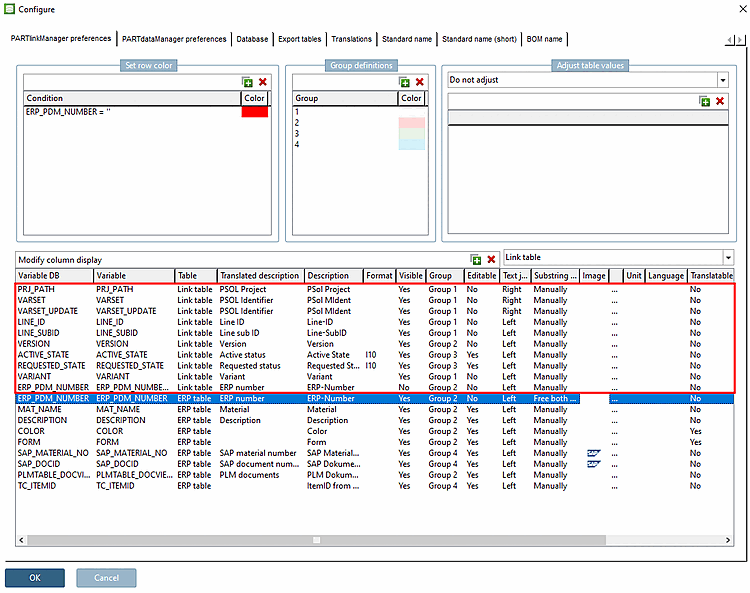
The block [LINKDBFIELDS] shows a listing of all existing LinkDB variables.
[LINKDBFIELDS]
PRJ_PATH="<%linktable%>.PRJ_PATH","PSol Project","","1","1","0","1","0",""
VARSET="<%linktable%>.VARSET","PSol MIdent","","1","1","0","1","0",""
VARSET_UPDATE="<%linktable%>.VARSET_UPDATE","PSol MIdent","","1","1","0","1","0",""
LINE_ID="<%linktable%>.LINE_ID","Line-ID","","1","1","0","0","0",""
LINE_SUBID="<%linktable%>.LINE_SUBID","Line-SubID","","1","1","0","0","0",""
VERSION="<%linktable%>.VERSION","Version","","1","2","0","0","0",""
ERP_PDM_NUMBER_LINKTABLE="<%linktable%>.ERP_PDM_NUMBER","ERP-Number","","0","2","0","0","0",""
ERP_PDM_NUMBER="<%erptable%>.ERP_PDM_NUMBER","ERP-Number","","1","2","0","0","1",""
MAT_NAME="<%erptable%>.MAT_NAME","Material","","1","2","1","0","0",""
ACTIVE_STATE="<%linktable%>.ACTIVE_STATE","Active State","I10","1","3","1","0","0",""
REQUESTED_STATE="<%linktable%>.REQUESTED_STATE","Requested State","I10","1","3","1","0","0",""
DESCRIPTION="<%erptable%>.DESCRIPTION","Description","","1","2","1","0","0",""
VARIANT="<%linktable%>.VARIANT","Variant","","1","1","0","0","0",""
This corresponds to the listing in the user interface under PARTlinkManager -> Extras menu -> Configure dialog window -> PARTlinkManager settings [PARTlinkManager preferences] tab page -> Configure column display [Modify column display].
Creation of columns for the PARTdataManager table
![[Note]](https://webapi.partcommunity.com/service/help/latest/pages/jp/3dfindit/doc/images/note.png) | Note |
|---|---|
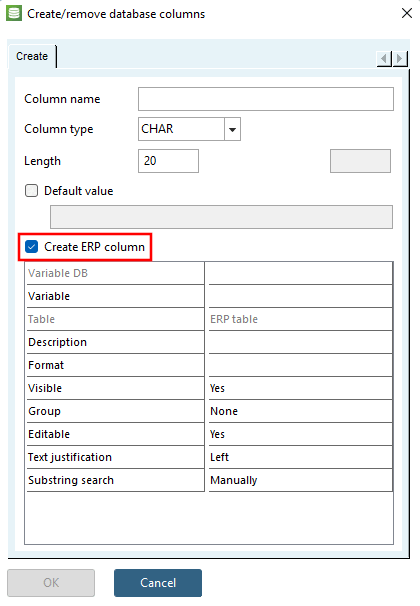
Adding and deleting of lines (columns) at this place concerns the internal PARTsolutions configuration. Here, there is no access to the database. So it can happen that columns are added here, but do not exist in the database itself. In such cases an error message appears during login. Problems can easily be avoided if you use the dialog under PARTlinkManager -> Database-> [Database] Change/create database columns [Modify/create database columns] (with set option Create ERP column [within PARTsolutions]). Then the new column is created in the database as well as in PARTsolutions. For details see Section 4.3, “Add / remove database columns ” database columns.
Details on creating database tables via scripting can be found under Section 4.2.4.1, “Installation scripts ”. | |
Column position in PARTlinkManager
Select the desired line and draw it to the desired position up or down with pressed mouse key.
Field name in the database. For example, if you execute an SQL query with select * from ERPTABLE, these column names are displayed.
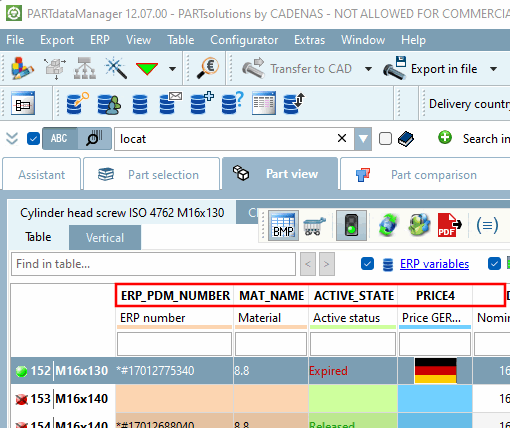
The name is used in PARTdataManager as the bold main name of the column.
The PARTsolutions modules internally work with this name.
"Table" corresponds either to the LINKTABLE or the ERPTABLE. Newly applied columns are usually entered into the ERPTABLE.
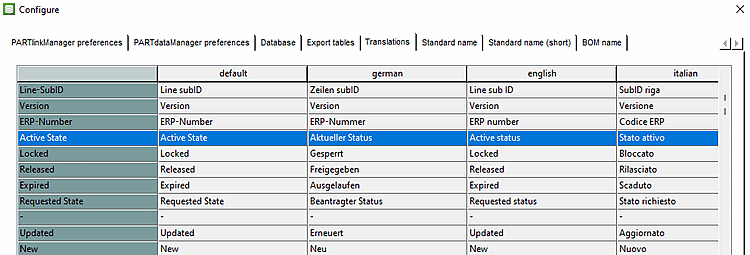
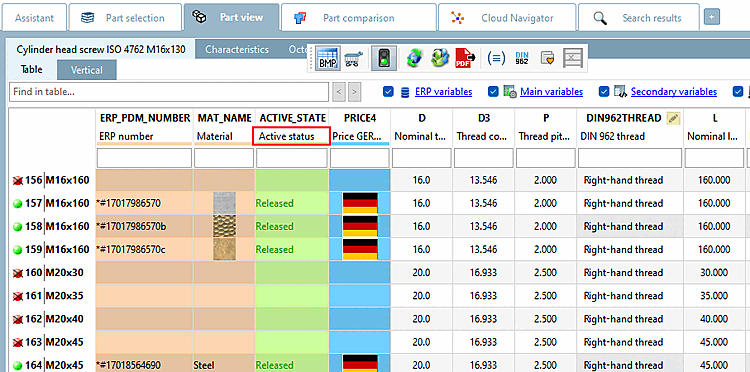
The translated description can be found - if available - under PARTlinkManager -> Extras menu -> Configure ERP environment -> Translations tab page
If there is no entry for the active language under PARTlinkManager -> Extras -> Configure ERP environment -> Translations tab page, the text under Description is used.
Visible corresponds to the column visibility in the main window of PARTlinkManager. This can be set to Yes or No.
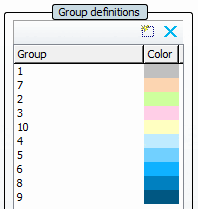
The individual columns in PARTlinkManager and PARTdataManager are highlighted in color.
The group name under Configure column display [Modify column display] -> Group column corresponds to the group names under Group definitions.
(Do not confuse this "group [Group] " with the user group (in the sense of "role"!)
Details can be found under Section 4.9.7, “ Background color for ERP/PDM columns / plinkcommon.cfg -> Block [GROUP_COLORS] -> Key GROUP<number> ”
In the PARTlinkManager main window there is the button . With this button you reach the window Edit row, where you can edit the database fields. If the field is set to "No", there is no access.
Value range Left | Right: If the field content cannot be displayed completely, the left or right end is displayed (in PARTlinkManager, for example, the end of the path is displayed in the PSOL Project column).
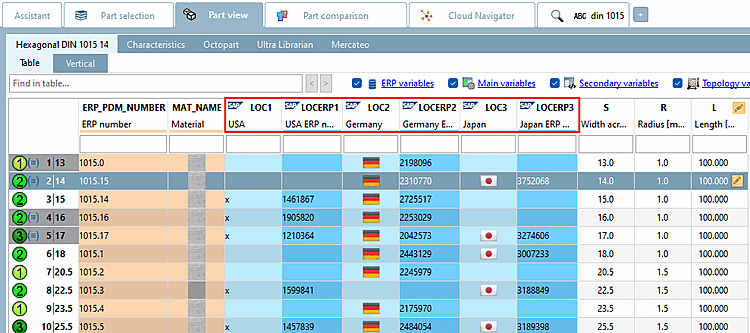
You can use icons in the column header of characteristic attribute tables in PARTdataManager. In this way you can mark columns with third party information (SAP for example).
Click on the Browse Button opens an Explorer window. Select the desired icon. The default storage path is
$CADENAS_SETUP/bitmaps.Unit: Optionally select the appropriate unit (length, weight, etc.).
Language: Specify the LinkDB language to ensure that the full text search works optimally.
Prerequisite: If TRANSLATIONTABLE is filled with values for certain ERP numbers, variables and languages and exactly these variables have been set to "Yes" in this option, they are displayed in 3Dfindit or PARTdataManager.






![PARTlinkManager > "Extras [Extras]" menu > Database > Edit additional tables](https://webapi.partcommunity.com/service/help/latest/pages/jp/3dfindit/doc/resources/img/img_fbdfbd54e24740e79cdb59ea8c0c242b.png)
